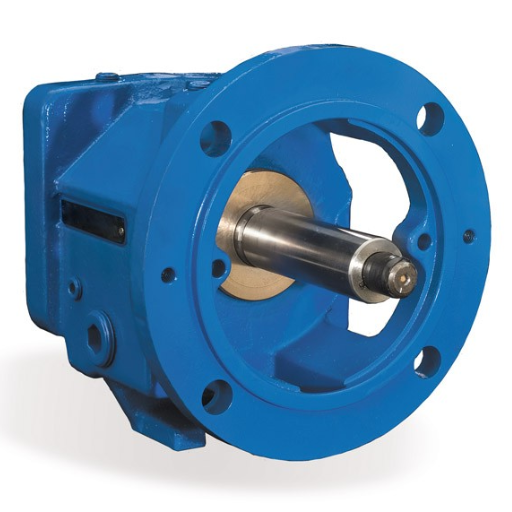
Maintaining and rebuilding your Seadoo jet pump is essential for ensuring optimal performance and extending the lifespan of your watercraft. A critical aspect of this process involves removing and replacing the pump bearings, which are prone to wear and tear due to consistent exposure to high loads and environmental elements. This guide is designed to provide a technical and comprehensive overview of the pump-bearing removal process, equipping you with the knowledge needed to approach your jet pump rebuild with confidence and precision.
How do I remove the impeller shaft bearing from a Sea-Doo jet pump?
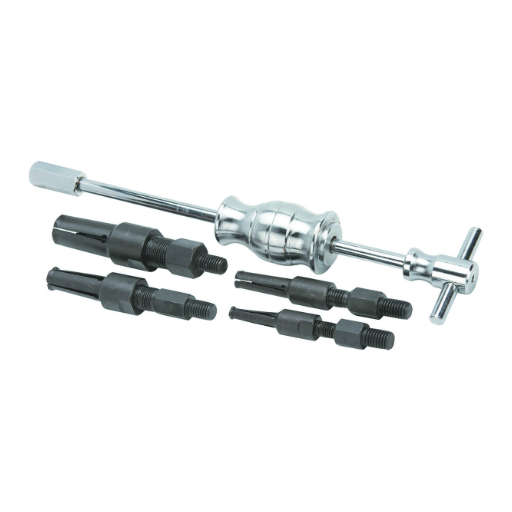
Tools required for Seadoo pump bearing removal
To extract the impeller shaft bearing from the Seadoo jet pump, the following advanced tools and equipment will be necessary:
- bearing puller or hammer: A pivotal tool for removing the bearing from the body of the jet pump without using excessive force which could break the bearing.
- Heat gun: Heats the casing of the pump and makes it easier to extract the impeller shaft bearing because of material expansion.
- Bearing press: A tool or even a device that is relevant to the installation of the bearing by the technique of pressing with a measured amount of force uniformly.
- Snap ring pliers: A unique tool that is used to remove the snap rings that are fixed on the bearings as a safety measure.
- Torque wrench: After putting the components back together, use a torque wrench to apply the right amount of torque as specified by the manufacturer, e.g., 222 for some screws.
- Rubber mallet: If precise force is required without breaking the components, this can be used.
- Marine-grade grease: Should be used on assembled parts for flawless movement on bearing surfaces and protection from rust.
Remember, if the right tools are used, one’s safety is guaranteed, components are not damaged, and the jet pump is maintained intact, which is very crucial.
A step-by-step guide to removing the impeller shaft bearing
- Disassemble the jet pump housing: First, take out the pump cover so you can get to the impeller shaft. Loosen the bolts, with the right tools like socket wrenches, and by the instructions set by the manufacturer.
- Remove the impeller: Using an appropriate impeller shaft securing device, Unscrew and remove the impeller from the impeller shaft. Be attentive to the threading as per the manufacturer’s instructions.
- Detach the snap ring: Using snap ring pliers, remove the snap ring that is holding the bearing in position. Make sure that the pliers are correctly sized so there is no chance of slipping or damaging the snap ring.
- Press out the bearing: Using the correct bearing press, place it over the shaft and remove the impeller shaft bearing. Apply gentle pressure until the bearing comes off, making certain not to break parts around the connected area. Most marine bearings require a pressing force of between 500 to 1000 lbs to disassemble.
- Clean and inspect components: After the bearing is taken out, clean the exposed shaft and its surrounding areas with an appropriate solvent. Check for any signs of wear on the shaft and the bearing seat.
- Apply marine-grade grease: Before putting in new components, lift the shaft and bearing surfaces first; then put some marine-grade grease for a good seal and easy operation and rust prevention.
Using this methodology makes it possible for the operator to effectively remove the impeller shaft bearing while avoiding damage to the components or self-injury. Should there be any guidelines given by the manufacturer, for example, range of torque or maximum allowable pressing force, those guidelines should always be followed.
What are the signs that my Seadoo pump bearings need replacement?
Identifying wear and damage on jet pump bearings
Keeping the ideal performance of your Seadoo while ensuring it is safe to use means you have to pay close attention to the wear and tear on its jet pump bearings. It is not uncommon to come across unusual vibrations, grinding noise, or a sudden drop in propulsion while operating your watercraft, which indicates that the jet pump bearings may be worn or damaged. Once these behaviors occur, the jet pump bearings need to be checked as they are highly likely worn out and misaligned, affecting the overall performance of the vessel.
- Shaft excessive movement: Internal broken or worn-out components can be identified if shaft movement is excessive at a level greater than (lower than)” 0.05mm which is the level specific by the manufacturer for high-precision bearings.
- Condition of bearings surface: A thorough visual inspection is very important as it can highlight scoring, discoloration, and pitting which highlights signs of material overheating.
- Resistance gradient: When performing the manual rotation of the bearing, if irregular feeling, binding, or resistance is determined, it could imply internal contamination and seizure.
- Acoustic Testing: When there are abnormal sounds such as grinding and clicking while maintaining the pump shaft in a rotating position, it can highlight debris intrusion and misalignment.
The technical specifications have to be checked correctly with the condition you observe around and in the Seadoo service manual, which makes it easier to know whether or not they are reasonable range. Because the impeller and bearings have an axis-type coupling connection, replacing damaged bearings in time will avoid impeller damage and unleash the full potential of the jet pump assembly.
Impact of worn bearings on Seadoo performance
The jet pump assembly of a Seadoo is very much affected in both efficiency and functionality by worn bearings. Bearings getting old are bound to worsen vibration levels, smoothness of an impeller’s rotation, and the amount of thrust generated while reducing the effectiveness of all-around propulsion. This greatly affects top-end speed and acceleration. Also, advanced wear may lead to imbalances creating the risk of the impeller and housing getting misaligned which further increases internal damage risks.
- Thrust Pressure: This is lower as the transfer of energy bearing wear makes it less efficient. With diagnostic equipment, the pressure drop can be examined making sure it meets the specified limits given in the service manual.
- Impeller Rotational Speed: Added friction and resistance have decreased it. Operational speeds for the impeller should regularly range between 5000 to 8000 RPM. Deviations beyond this tolerance set by RAM suggest bearing problems.
- Vibration Levels: Bearing imbalance can be indicated by vibrations measured via a vibration analyzer. These higher levels of vibration do not conform to the acceptable vibration thresholds defined by ISO/ANSI vibration standards.
Identifying and replacing worn-out bearings can quickly reestablish operational efficiency, thus averting secondary damage to the impeller and the nearby parts.
Can I rebuild my Seadoo jet pump without professional help?
DIY Seadoo pump rebuild: Pros and cons
Rebuilding your Seadoo jet pump without professional assistance can be a feasible task if you possess the necessary mechanical skills and access to the right tools. Below is a concise analysis of the advantages and challenges involved:
Pros:
- Self-Repairing: If you want to save money, opting to self-repair can be beneficial as you will greatly lessen the costs by doing the bulk of the work.
- System Knowledge: Having the ability to help rebuild a pump on your own brings in the knowledge of the inner workings of a Seadoo so you can make finer adjustments later on.
Cons:
- Never Ending Workload: Seadoo issues are made to be solved by engineers, but not everyone has professional help on standby. You are more than welcome to fix the issue yourself whenever you choose.
- Heavy Equipment: The major downside is having to own some heavy equipment. However, it is essential such as have a bearing puller, torque wrench, and seal installation tools. Without these, the assembled equipment will be ineffective.
- Professional Resume: If you are still adamant about taking the approach of self-fixing, be prepared to have a specialty in the area covered. Having precise knowledge of tolerances and specifications to rebuild a jet pump is crucial.
- Wear Ring: This piece when in contact with an impeller shred needs to have a clearance of 0.35 mm to 0.65 mm. This ensures that the jet’s propulsion isn’t too efficient and causes the dreaded cavitation.
- Shocks: make use of the tools in such a way as to avoid over or under sizing stresses. This will subsequently translate to avoiding breakage due to loads of +1500cm3.
If you are experienced in mechanical tasks, capable of following precise technical procedures, and have access to the correct tools, undertaking a DIY rebuild is viable. However, for individuals without this expertise, consulting a professional is advisable to uphold safety standards and ensure the longevity of the pump components.
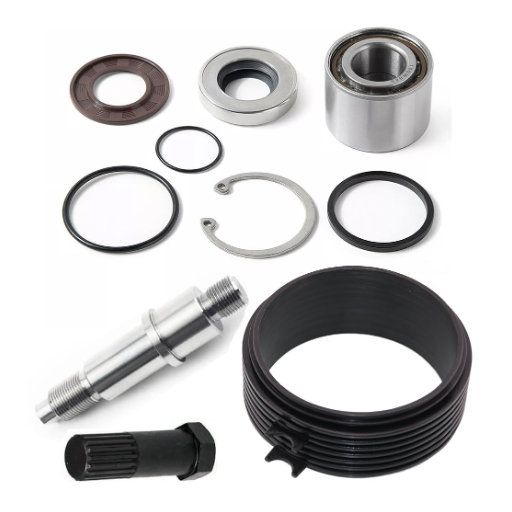
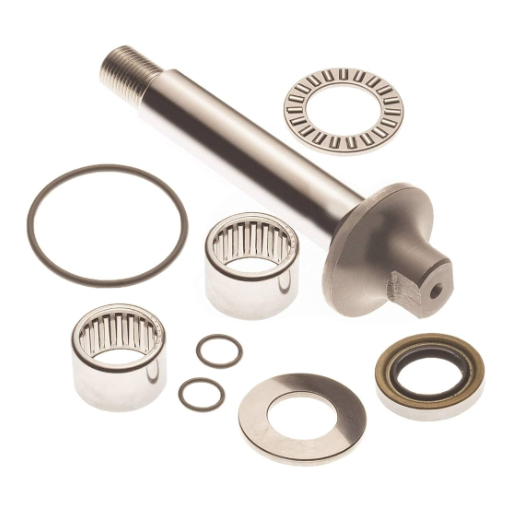
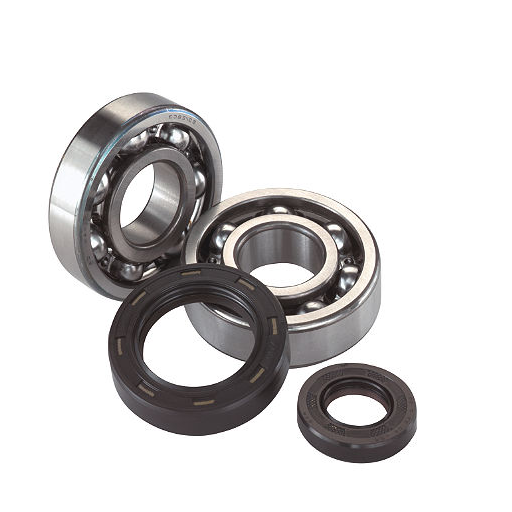
Essential tools and parts for a jet pump rebuild kit
Rebuilding a jet pump requires specialized tools and materials to ensure accuracy and save time and effort. Here is a listing of the items you’ll need along with their intended use:
- Torque Wrench: A torque wrench is key to properly tightening bolts and nuts such as those on the impeller shaft which tend to have a specification of around 20 – 25 ftlbs depending on the brand.
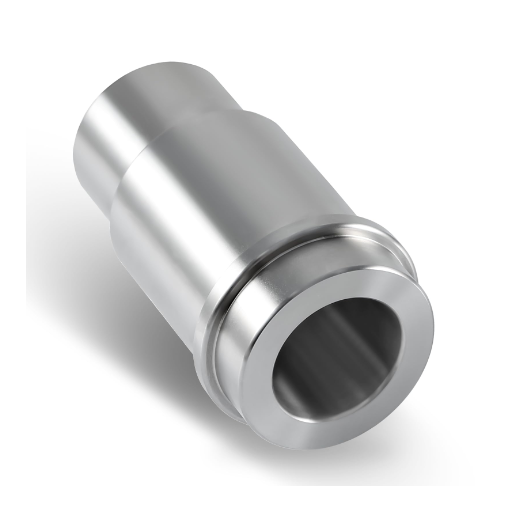
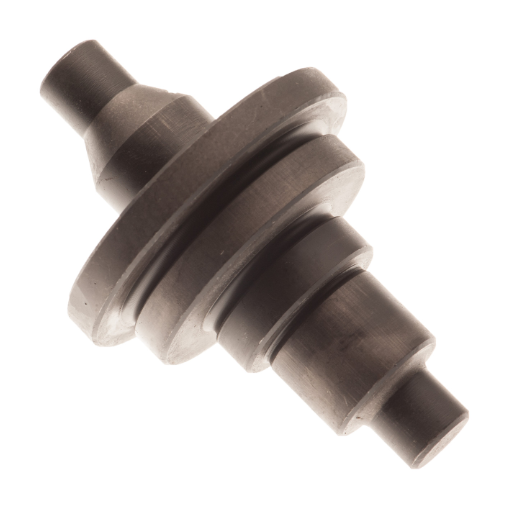
- Bearing Puller: This tool is meant for the removal of old bearings and makes the procedure less harmful to the surrounding areas.
- Seals and O-rings: These replacement components must essentially be a perfect fit to the originals and constructed from similar materials to prevent water intrusion. Durable water-based seals are made from Nitrile and Viton.
- Grease: This special grade having exceptional resistance to water washout is perfect for lubricating bearings and other moving parts on a pump.
- Replacement Impeller or Wear Ring: Like the other components, the part number must match and be confirmed to be compatible with the pump model size to ensure this is a needed part.
- Clean Cloths and Cleaning Solvent: It’s an essential set of items such as cleaning materials to scrub off dirt, old grease, and gunk on pump surfaces before re-assembling.
These are the fundamental tools and parts for a jet pump rebuild kit.
How do I properly install new bearings in my Seadoo pump?
Preparing the jet pump housing for new bearings
- Disassembling the Pump Housing: The first step is to disassemble the unit by taking off the impeller and the wear ring first, followed by the use of any additional tools that might be necessary to minimize damage to components that are nearby.
- Thoroughly Clean the Housing: Wipe the housing of the pump with a clean cloth, make use of suitable cleansing solvents, and ensure the accumulation of old grease, debris, corrosion, or any other components is dealt with. Such removes a set of contaminants on the surface.
- Inspect the Housing: Determine if the pump housing shows any signs of polygonal shapes other than intended, cracks, or wear. Check if the bore dimensions fall under the range of the manufacturer’s tolerances which is commonly ±0.002 inches to avoid an undesired fit of bearing.
- Chill the Bearings: The bearings that need to be replaced should be stored in the freezer for about 1-2 hours previous to the installation. By chilling them, the bearing expands a bit allowing easy press-fit installation.
- Heat the Housing: The housing can be warmed with a heat gun or by placing it in the oven for around 150 F (65 C). Such makes the bearing seat cooler as it expands lightly making it easier to fit.
- Install Bearings: Place the bearings into the sleeve using a bearing press or fit them in with a gentle-tapped mallet. Such should be done with moderate pressure so that the bearings have contact with the outer walls of the sleeve.
- Verify Placement: Confirm the position of the bearings relative to the housing and ensure that they are placed in the correct position. It is crucial, however, that they are placed without any gap as it may result in misalignment, wear, or failure.
Proper steps such as checking the operating conditions and adding liquid nitrogen ensure that new bearings are installed properly which aids in fully utilizing the jet pump assembly.
Correct installation techniques for Seadoo pump bearings
- Moderate mechanical and thermal stresses: The optimal practice suggests that the bearings be bathed in liquid nitrogen before installation to aid thermal fracture. Due to the temperature differential, the bearings are easily secured into place with moderate mechanical force. Make sure the tolerances of the housing material are suitable for the expected thermal coefficients.
- Force Application During Installation: While pressing the bearings, gentle and even force should be used. A bearing press or a rubber hammer should be utilized to prevent damage. If too much pressure is applied, or if force is used unevenly, the surfaces of the bearing may become deformed, misaligned, or displaced.
- Alignment and Gap Examination: To prevent too much wear or a complete operational breakdown of the device, it must be ensured that the installed bearings are a snug fit so no gaps exist between the bearing and the housing surface. The tolerance of the bearing seat is commonly expected to be within a range of ±0.02 mm to guarantee correct positioning.
These steps not only ensure longevity but also optimize the performance of the pump assembly.
What precautions should I take during the Seadoo pump-bearing removal process?
Avoiding damage to the impeller shaft during bearing removal
Taking good care of the impeller shaft while detaching bearings is possible using the correct techniques as well as tools. To bear evenly, without the excessive application of torque, a bearing puller or a press should be used. The points listed below should also be taken into account:
- Precise Tooling: Unwanted impact on the shaft can be reduced and as such, use a puller that is designed specifically for such bearings.
- Support and Stability: Every effort must be taken to ensure that while the work is taking place, the shaft has to be properly supported. Through force, unsupported shafts can get deformed or bend.
- Extraction Load: For utmost effect, the shaft should be pulled with controlled and evenly spread out force. Heaved amounts of pressure should not be earmarked since it may surpass the shaft’s yield strength. For exact measurements, contact the manufacturer.
- Heating Bearings: If the bearing seems to be rusted, try opening it using thermal expansion. Mildly heat the outer race to up to 250 °F or 120 °C; gently breaking the shaft is the goal. This, if done correctly, will have several effects: The bond between the shaft and the bearings will be loosened sealing and no damage will be done to the shaft. However, do take care not to overheat.
If these steps are followed, fit and function will be satisfactory during reassembly, and the impeller shaft will remain intact.
Safety measures when using bearing removal tools
- Use of Appropriate PPE: It is important to always wear PPE such as safety glasses, gloves, and steel-toed boots as these offer protection against flying debris or accidental tool slips. This will make sure that workplace safety policies are met.
- Inspection of Tools Before Use: Visual inspection of all bearing removal tools for wear, cracks, or damage before use is necessary. Failure of damaged tools under load may pose safety risks.
- Components Should be Fixed and Stabilized: Clamp or stabilize the component and the shaft to prevent any movement during extraction. Loose components can cause accidents or interfere with other equipment.
- Recommended Force Application: Use only the recommended force levels specified by the tool manufacturer. Excessive force can result in equipment failure or damage to the part being removed. For example, a hydraulic puller should not exceed its rated pressure, which is usually detailed in the operation manual.
- Use of Heat: Heat should only be applied with the proper safety precautions including heatproof gloves and working from well-ventilated rooms. The use of excessive energy or heat is not recommended if the desired outcome is to maintain undamaged materials. For example, do not exceed 250F or 120 C.
- Workspace Maintenance: Remove oils, grease, and clutter from the workspace to lessen chances of contamination or slipping during removal operations.
By following these justified technical requirements, safety and efficiency during bearing removal can be effectively guaranteed.
Frequently Asked Questions (FAQs)
Q: How do I remove the jetpump bearing from my Sea-Doo?
A: To remove the jetpump bearing from your Sea-Doo, you’ll need a bearing puller tool. First, remove the impeller and wear the ring. Then, use the bearing puller to carefully extract the bearing from the pump housing. Be sure to follow your model’s specific instructions, as the process may vary slightly between different Sea-Doo models.
Q: What tools do I need for a Sea-Doo pump bearing removal?
A: For a Sea-Doo pump bearing removal, you’ll need a bearing puller tool, a socket set, pliers, and a rubber mallet. You may also need a heat gun to help loosen stubborn bearings. Always consult your Sea-Doo’s service manual for model-specific tools and procedures.
Q: How often should I replace the pump bearing on my Sea-Doo?
A: The frequency of pump bearing replacement depends on usage and maintenance. Generally, it’s recommended to inspect your Sea-Doo’s pump bearing annually and replace it every 100-200 hours of use or if you notice any signs of wear, such as unusual noise or vibration. Regular maintenance can help extend the life of your jetpump bearing.
Q: Can I perform a Sea-Doo pump bearing removal myself, or should I hire a mechanic?
A: While it’s possible to perform a Sea-Doo pump bearing removal yourself if you’re mechanically inclined, many customers prefer to hire a professional mechanic. The process requires specific tools and knowledge, and improper removal can damage other components. If you’re unsure, it’s best to consult a certified Sea-Doo technician to avoid potential issues with your warranty.
Q: Where can I purchase a new pump bearing for my Sea-Doo?
A: You can purchase a new pump bearing for your Sea-Doo from authorized dealerships, online PWC parts retailers, or directly from the Sea-Doo website. Be sure to have your model number and year handy when purchasing to ensure you get the correct part. Some online shops offer customer reviews and forums for discussion about part compatibility and quality.
Q: What are the signs that my Sea-Doo pump bearing needs replacement?
A: Signs that your Sea-Doo pump bearing needs replacement include unusual noise or vibration from the jet pump area, decreased performance or power, water leakage around the drive shaft, or visible wear on the bearing itself. If you notice any of these symptoms, it’s important to address the issue promptly to prevent further damage to your PWC.
Q: How long does a typical Sea-Doo pump bearing removal and replacement take?
A: A typical Sea-Doo pump bearing removal and replacement can take anywhere from 2 to 4 hours, depending on your experience level and the specific model. This process involves removing the jet pump, extracting the old bearing, installing the new one, and reassembling the pump. If you’re new to this type of maintenance, it might take longer, so be sure to set aside ample time for the job.