This guide will help you through reupholstering the motor bearings on a Hayward Super Pump Pool. Completing this task ensures the efficiency and lifespan of your motor within the pump. Bear in mind that machinery operates under severe conditions, and certain parts will wear over time. If not addressed, the degradation of any part will lead to reduced performance and increased noise. This article serves to help you confidently tackle this problem and your pool’s reliability. I’ll also provide you with some handy tips so the entire process will be straightforward and stress-free. As a seasoned DIYer, I am confident that I will give you the knowledge to render issues with the motor insole a walk in the park.
How Do You Know If Your Pool Pump Needs Repair?
Signs of a Malfunctioning Pool Pump Motor
In my experience, there are key indicators that a pool pump motor might fail, which should be fixed quickly to ensure the pool works appropriately. Here are some of these indicators:
Unusual Noise—Any sort of grinding, screeching, or humming sounds suggest issues with the bearing or misalignment. Most of these noises affect the motor’s performance and efficiency and add stress to its internal components, limiting its overall lifecycle.
Overheating—If the motor is excessively hot to the touch, then it has issues with ventilation or electrical problems, such as a faulty capacitor. Overheating can directly affect the motor’s RMP (revolutions per minute) and amperage by extending it beyond the recommended ratings.
Decreased Water Flow—A clog or wear down of the motor may cause low water circulation. This can cause low pressure and prevent the system from reaching the appropriate gallons per minute (GPM) necessary for the water to be filtered.
A tripping circuit breaker tends to suggest issues such as overloading and short-circuiting. If the motor regularly trips the circuit breaker, there is an issue with the voltage supply stability, and the other pool equipment could be damaged because of this.
Failure to Start – If the pool pump motor does not start or starts with difficulty, the most probable causes are a defective capacitor, wiring issues or blocked components. All these issues prevent the motor from achieving the required operational torque and starting current.
Each of these signs indicates specific technical faults, and therefore, it is crucial to check and diagnose the motor operational parameters like amperage, voltage, RPM, and GPM. Adequately addressing these issues will ensure optimal motor performance and optimum longevity of the pool equipment.
Identifying Bad Bearings
In poorly installed or damaged bearings, the common factors that I analyze are abnormal vibrations, excess noise, or unnatural temperature rise during functioning. These issues directly affect the motor’s technical performance. For instance, overheating of the motor can lead to the following problems.
Amperage: Increased Amperage, which can be seen on the ammeter, can indicate damaged bearings. Since more energy is needed to spin the motor due to increased friction, a higher Amperage is drawn.
RPM: Reduced motor speed means reduced RPM, and it can be assumed that the wear and tear of the bearings, which is a faulty component, is directly linked. This, of course, may affect overall productivity.
Temperature: Rotor overheating is quite common with faulty bearings. Overheating occurs because excessive internal friction, when combined with excessive load, produces too much heat for any system.
If I want to avoid a non-invasive failure detection system, I must focus on these parameter shifts. Fixing this quickly is critical to preventing damage and maintaining the motor’s effectiveness.
Common Pool Pump Issues and Their Causes
The most widespread issue among swimming pool pumps involves the seal, wherein water can escape at an alarmingly fast rate. Because of this, the pump’s output and functionality drop severely, and the motor could potentially overheat if the water gets to important parts. Seal failure and motor overheating are some technical parameters that are affected due to major breakdowns in the system.
Another significant concern is the leakage of air into the suction piping. In ordinary circumstances, water is supposed to flow freely. This creates a situation where the pump loses its prime, leading to cavitation. This, in turn, puts unnecessary stress on the impeller and damages it slowly. The suction pressure will be highly affected here because it will drop significantly, along with the rotational flow of the impeller, which will also go down.
Moreover, dirty or blocked filters can restrict water supply, putting unnecessary pressure on the pump. This results in a motor burning state, raising the amp draw and reducing the motor’s lifespan. In this case, the flow rate will fall, and the amp level will increase above normal.
Explaining every detail, ensuring that I am addressing the expected details of these issues immediately, ensures that the smooth operations of the pool system units, along with its pump, are working the ot marks, avoiding units for long-term damage.
What Tools Are Required for Pump Motor Bearing Replacement?
Essential Tools for Motor Repair
I always depend on a specific set of tools to replace the pump motor bearings properly. They ensure that the entire process is accurate and simple. These tools include:
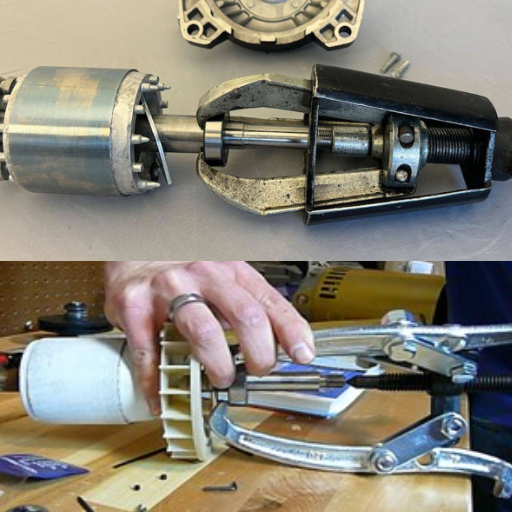
Bearing Puller – This is used to safely remove the broken bearings without damaging the motor shaft or housing.
Wrenches and Screwdrivers – These are needed to dismantle motor parts for easier access to the bearings.
Rubber Mallet – Used to tap and set new bearings in their position carefully.
Lubricants help with the installation of new bearings and ensure that they will function smoothly after repair.
Multimeter – Used to check electric continuity to see if motor windings were damaged during repairs.
When used as intended, these tools guarantee that the technical parameters affected by the bearing replacement are cured, which include:
Flow Rate: Correctly fitting new bearings improves the alignment of the motor within the housing, which enables the pump to operate at the desired efficiency.
Current Draw: The newly placed bearings considerably lessen friction, lessening the current draw. This prevents overheating and motor damage.
Noise Levels: Inefficient or poorly fitted bearings are the singular cause of excessive noise. However, replacing the improper bearings helps to resolve this problem.
I can effectively increase the pump’s lifespan and efficiency by taking care of these technical aspects.
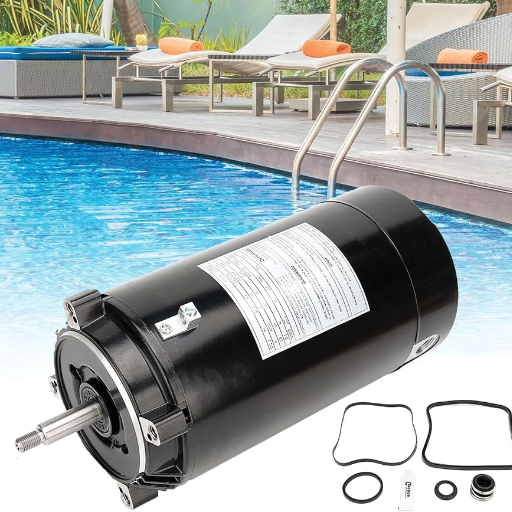
Using a Seal Kit for Hayward Super Pump
Using a seal kit for the Hayward Super Pump is vital to keep the pump running smoothly without any leaks. Replacing the seals prevents water from getting to the motor, which could lead to serious short-circuiting or, in the long run, burn out the motor. The procedure of using the seal kit affects a few technical aspects:
Water Tightness: New seals can fix any leaks, so the pump will work without loss of suction or prime.
Motor Protection: The absence of water intrusion helps keep the motor dry, which prevents corrosion and electrical failure.
Efficiency: Compared to an air mix, there is minimal loss of adequate sealing. This helps water flow through the pump system and increases overall pump efficiency.
Longevity: Maintenance, such as seal changes, helps control the life of the pump and its parts by preventing damage caused by persistent leaks.
By solving each of these factors in an orderly way, I ensure that the pump remains trustworthy and operates at the desired parameters for many years.
Safety Precautions During Replacement
As I replace seals, I conduct a thorough inspection to provide myself with the utmost safety as well as maintain the integrity of the pump system:
Disconnecting Power Source: To avoid electrical injuries, it is essential to disconnect the pump from the power source before commencing to ensure that no mechanical movements are made while performing the task.
Depressurization: I release any pressure from within the system before proceeding to disassembly, which is followed by specific guidelines in the seal manufacturer’s manual.
Appropriate Tools: The appropriate tools, especially those designed for seal installation and removal, can avoid damaging the sealing surfaces or any components surrounding them.
Parts Examination: I clean and examine all of the relevant parts, namely the shaft and housing, for any form of wear, corrosion, or debris. This ensures a solid seal installation and makes the areas clean enough to work on.
Seal Manufacturer’s Instructions: Warranties are not to be voided, so following the installation instructions in the letter is essential. This ensures the seal works and functions as desired.
All precautions guarantee the pump’s operational stability, preventing downtime and ensuring complete compliance with the technical requirements.
How do you replace the bearings in a Hayward super pump motor?
Step-by-Step Guide to Bearing Replacement
Assemble Relevant Tools and Materials: Grimey’s own Haywood Super Pump uses bearings that most models will reuse, so make sure to inspect the manual to find out the specific type and sizes of bearings used. Also, make sure to have a soft mallet, grease, snap-ring pliers, a socket wrench set, and a bearing puller in hand.
Disconnect All Power Sources Then Remove The Motor: This step prevents injuries during the procedure, so do not forget to disable the power source first and then disconnect the motor from both the pump and electrical supply.
Dismantle the Motor Housing: Carefully detach the bolts holding the Motor housing together and completely unscrew them. Once completed, gradually remove the housing to reveal its components, such as the bearings and shafts.
Remove the Seal plate and Impeller: First, remove the seal plate to access the bearing. Then, gently remove the impeller after unscrewing the impeller nut. Use a wrench to prevent the shaft from wiggling.
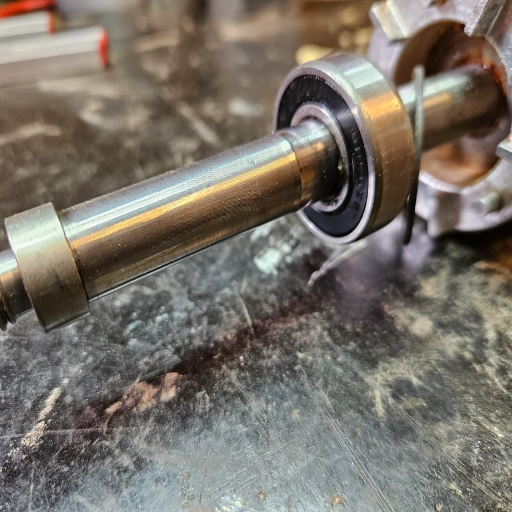
Withdraw Old Bearings: Proceed to remove the old bearings located on the shaft with the bearing puller, taking care not to damage the shaft. Lastly, rinse off all grime and grease from the shaft and bearing housing.
The following procedures focus on installing new parts in motors and pumps, confirming that the procedures will be effective in replacing the bearings your motor uses.
New Bearing Installation. A thin coating of grease should be applied prior to installing the new bearings. Ensure the shaft and the new bearings are aligned before gently tapping them using a soft mallet. Be considerate of the amount of force you use to prevent misalignment and damage.
Motor Component Reintegration. Following the procedure above, the next step is to place the seal plate, Impeller, and motor housing back in place in an inverse order to which they were taken off. Ensure all bolts and screws have a tight and firm fit.
Pumps Electric Connection and Motor Testing. The last step is to place the motor back on the pump and plug the device into the power socket. Start the device and observe if the motor functions in a smooth and quiet manner, confirming that the bearing replacement was adequate.
Following these steps accurately ensures your pump motor’s practical function and considerably increases its life span.
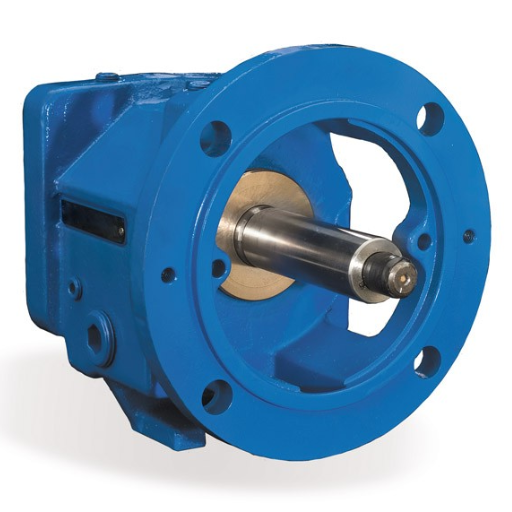
Removing the Pump Motor and Shaft
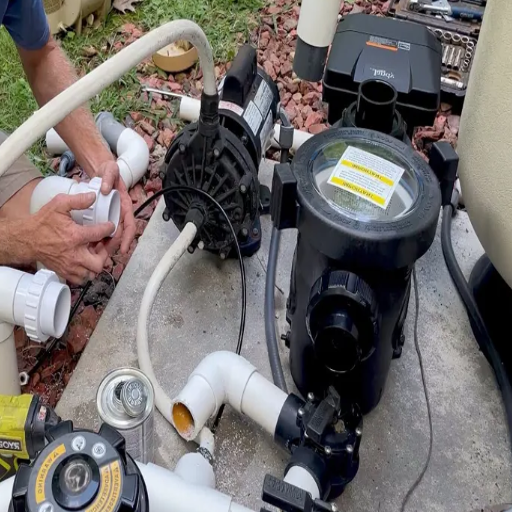
When it’s necessary to take apart the pump, motor, and shaft, it is essential to pay attention to the safety and efficiency of the process. Thus, the steps are as follows:
“Remove Power Source and Wire Disconnect—The first step is to destroy the electrical supply to the pump and disconnect any power that leads to the system. This step is crucial to ensure safety by preventing potential injuries.
Purge Pump”- Softly remove the drainage cork or actuate its discharge to extricate any remaining liquid. This step is necessary to avoid spills or damage while taking the unit apart.
Detach Pump Cover—First, Load and remove the bolts, fastening the pump structure to the motor. Note that some models can be fitted with special bolts that require wrenches from 10 mm to 14 mm. To assemble the unit back, make sure to keep the fasteners intact.
Remove Bend—Gently remove the impeller by maintaining the position of the shaft using a shaft wrench or lock pliers. Make sure to consult your pump’s user manual for the right tools. Last, look out for left-hand threads, which are commonly found in several pump structures.
Disassemble the Impeller—After removing the impeller, gently pull the motor shaft from the pump assembly. Note the shaft’s condition as well. If it shows significant wear, it may have to be replaced.
By following these policies and examining the related measures, you guarantee that the removal process is effective and precise while also saving time and avoiding potential damage.
Installing New Motor Bearings
In order to install new motor bearings effectively, cleaning the shaft and removing any debris and old lubricant from the bearing housing is critical. This will facilitate the installation process by ensuring that the motor functions appropriately afterward. As you align the new bearings with the shaft, take extra caution to ensure that the new bearings are appropriately matched based on the motor’s specifications. Once this is confirmed, use a bearing press or other instrumental devices to gently slide the bearings into place without applying excessive force that could potentially damage them.
For further efforts which might affect the technical parameters, ensure the following:
Bearing Fit—Ensure the new bearing is neither too tight nor too loose, as this might impair effective motor operation due to misalignment or excessive vibration.
Lubrication – Refer to the manufacturer’s manual to confirm the type and amount of lubricant recommended to maximize bearing life.
Shaft Alignment – Always check the proper shaft alignment after the bearing installation to avoid future problems with efficiency and proper motor function.
Torque Specifications—To enhance the motor’s efficiency, Remember to tighten all the fasteners to the torque level specified in the user manual.
By considering these points, you will be able to install the bearings with great precision, ensuring that the motor retains all its functions.
What Are the Benefits of Regular Pool Pump Maintenance?
Extending the Life of Your Swimming Pool Equipment
It is recommended that consistent checks be carried out on the swimming pool equipment to ensure that it performs optimally. I clean and service my pool pump regularly as this prevents clogging and reduces operational strain. For Example, cleaning the pump basket and filters weekly improves dirt circulation and builds clogging prevention. Moreover, I monitor any unusual sounds or temperature changes as these could be signs of problems like motor misalignment or insufficient lubrication.
From the technical point of view, parameters such as pump motor efficiency, flow rate, and pressure level are a few things that require rational maintenance. For instance, correct shaft alignment eliminates energy losses and the wearing out of the bearings. Reducing friction through proper lubrication increases the pump’s efficiency, lowers operational noise, and improves the pump’s functionality. Another critical aspect is adhering to torque specifications during assembly. This prevents mechanical failures and enhances the system’s proper functioning over time. By regularly maintaining the entire pool equipment set, I find that not only does it last longer, but it also operates with greater efficiency and reliability.
Improving Pump Efficiency and Performance
There are certain areas that I give special attention to to enhance the efficiency and performance of pumps as they are very effective. First, I check and align the shaft often. Misaligned shafts add energy loss and wear and tear, which directly impact power usage, life span, and other parameters. When shafts are adequately aligned, energy transfer is seamless and puts no unnecessary strain on components.
Second, I check to make sure that the pump bearings are lubricated in a timely manner. Without proper lubrication, the components can degrade and cause an increase in friction. This is directly proportional to power usage, the operational temperature of the components, and the noise produced. Monitoring the lubrication of the bearings has a huge impact on energy efficacy and noise production.
Finally, I always adhere to torque specifications when repairing and assembling. Over- or under-tightening bolts crumbles the pump’s strength, which in turn causes a plethora of pressure-related issues and mechanical failures. By adhering to torque guidelines, the pump is protected from structural weakness and ensures that the pressure levels are stable.
Focusing on these measures has allowed me to observe better performance and longer lifespans in my pump equipment while ensuring that the technical parameters are well maintained.
Preventing Costly Pool Repair and Replacement
I must ensure the water is balanced correctly to avoid expensive repairs to my pool’s equipment. By controlling the pH levels, total alkalinity, and calcium hardness, I reduce the chances of corrosion and scaling, damaging components like filters, pumps, and heaters. For example, imbalanced pH will cause undue wear on the pump seals. I set the pH level to between 7.2 and 7.8 and the alkalinity to between 80 and 120 ppm. This way, the equipment works and remains undamaged.
Furthermore, to prevent strain on the pool pump and filter, I do not neglect the regular cleaning and inspection of the pool filtration system. This helps avoid clogging and pressure buildup, which increases the chances of mechanical failure. Changing the filter pressure gauge to an ideal setting (generally between 10-20 psi, depending on the system) will help identify damage and keep water circulation steady.
To avoid setting the components under undue stress while ensuring the ideal pressure and flow rate, thus protecting the pump from failure, I ensure strict adherence to the manufacturer’s guidelines regarding the replacement of parts such as seals and ring obstructions and lubrication of the bonds.
Where Can You Get Help with Pump Motor Bearing Replacement?
Consulting with Inyo Pool People and Other Experts
Consultations with Inyo Pool People and other industry specialists can assist you in solving pool pump motor bearing concerns. There is expert help in diagnosing the bearing problems by providing professional advice on overheating, unusual noises, or any reduction in pump efforts as some of the symptoms of bearing failure. Furthermore, their support extends to determining if a replacement is warranted or if the bearings can be serviced.
When prioritizing bearing replacement, leading specialists usually focus on certain very important factors ,such as the following:
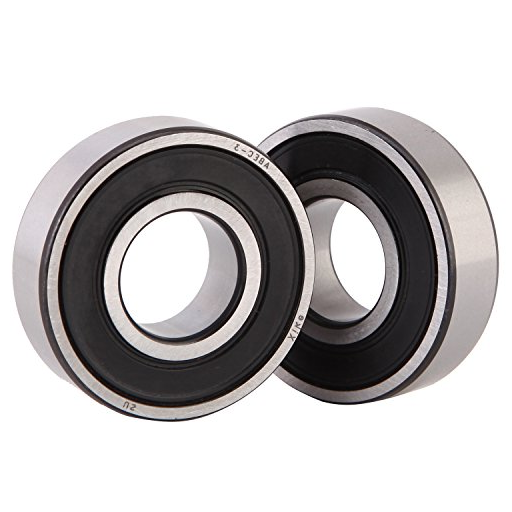
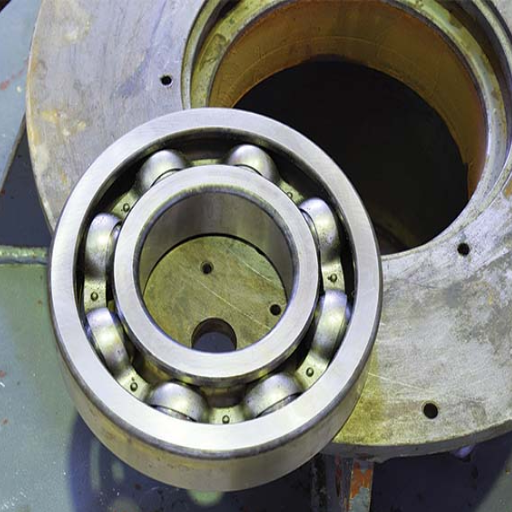
Bearing Type: Ensure it suits your pump motor model’s specifics (e.g., sealed bearings versus shielded bearings).
Load and Speed Ratings: Check if the bearings can accommodate the pump’s operating load and speed rate.
Temperature Tolerance: The bearings must tolerate heat, which is bound to be generated during prolonged pump use.
Lubrication Requirements: The type and intervals of lubrication should adhere to the set guidelines to eradicate the chances of accelerated deterioration.
Consulting seasoned technical people, such as Inyo Pool People, provides firsthand reliable technical information for the proper maintenance of your pool pump while ensuring optimal performance. Remember, always combine their expertise with your device’s manual so that those standards can be covered in the recommendations.
Finding a Reputable Motor Shop
I would first check whether they are focused on pool pump motor maintenance and replacement when searching for the best motor shop. I want to make sure they can satisfy my scrutiny along with the specific technical concerns I have about the bearing’s performance. Here’s how I’d go about it:
Type of Bearing: I would ask the shop whether they can determine whether sealed or shielded bearings are more appropriate for my pump. If this restricts compatibility with my model, I will obtain logic-based answers from my model’s manufacturers.
Load and Speed Ratings: I would ask them if they can determine whether the proposed bearings can support the normal loading and rotational speed of my motor while maintaining efficiency and non-compromising safety.
Temperature Tolerance: I would want to find out if the motor shop guarantees that the replacement bearings can function under extreme operational heat buildup during daily usage. This is paramount in increasing long-term use.
Lubrication Requirements: Lastly, I would ask whether they provide instructions or guidelines on the correct lubrication to avoid bypassing my equipment manual and causing excessive wear.
I am willing to choose a motor shop that justifies every selection it makes with comprehensive technical rationale and is willing to give advice that follows the manufacturer’s standards. Their attention to detail certainly contributes to the overall quality of their work.
Frequently Asked Questions (FAQs)
Q: Which key events should I focus on when diagnosing a faulty pump bearing?
A: Key moments the operator should observe comprise strange sounds such as grinding or squeaking, shifting, and a drop in the pump’s productivity. After spotting these indicators, examining the pump bearing and its impeller for damage or abrasion is crucial.
Q: How will you troubleshoot the issue of a Hayworth pool pump emitting noise in the way of grinding?
A: The first step involves switching off the pump and checking for obstructions on the impeller. If not, check the pump’s bearing and seal for signs of abrasion. Most often, a grinding sound indicates a failing bearing that must be replaced. In some instances, you may have to change the entire motor or the pump housing if there is excessive damage.
Q: Is it plausible to do a self-aid repair on the pump bearing of a Hayworth pool?
A: Yes, this issue is possible for knowledgeable homeowners. First, you must take apart the pump, extract the broken bearing, and replace it with a new one. But if you’ve ever had doubts regarding your skills, you should seek assistance from professionals to restore it without risking other elements like the motor shaft or pump seal.
Q: What standard tools will I apply when replacing the Hayward pool pump bearing?
A: You will need a screwdriver, a wrench set, pliers, and a bearing puller. If you need to disconnect any pipes, PVC pipe cutters will also be useful. Lastly, do not forget the replacement parts: a new bearing, gasket, and possibly a new pump seal.
Q: What is the timeframe for replacing a Hayward pump’s pool bearings?
A: A pump bearing can normally last an average of 3-5 years, but it depends on how well you maintain it. Regular checking and providing oil when necessary can help. If you notice more frequent noise and vibrations while using the device and performance is declining, consider replacing your bearing.
Q: What is the gain of keeping and doing my best to repair my pump bearing rather than replacing the entire pump?
A: Replacing your bearing saves more money than replacing the entire pump and is also less wasteful. If the problem lies within an old pump that has too many issues, replacing it with an efficient modern electric pump will ultimately be cheaper.
Q: How can I tell if I need to change only the pump bearing or the entire motor?
A: If the bearing is damaged, but the motor shaft, rotor, and stator are in good condition, it is reasonable to replace the bearing only. If the motor components have significant damage or the motor is older and useless, then replacing the entire motor would make more sense. A specialist can assist in evaluating damage, if any.
Q: What should I do if I require assistance repairing my Hayward pool pump bearing?
A: Should you require assistance, it is advisable to visit Hayward’s official page, which has diagnostic articles and instructional videos. You can also reach out to their customer support team for help. For more practical assistance, try looking for a certified pool technician who can scope out the problem and fix it to prevent additional costs down the road.