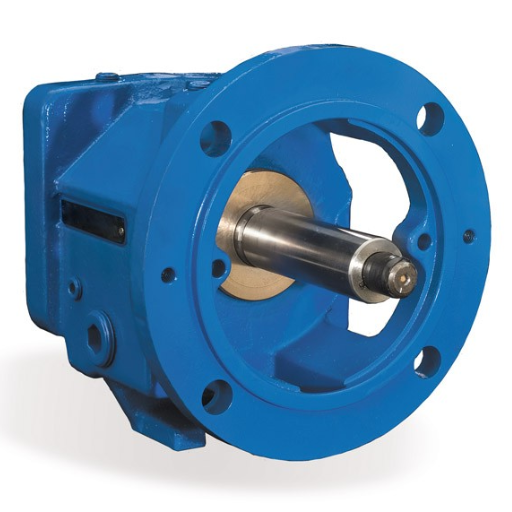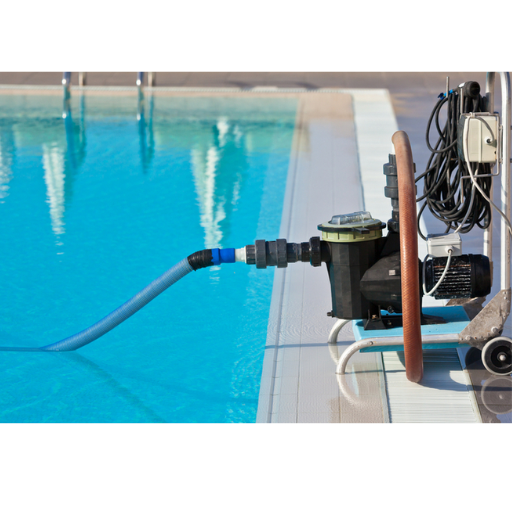
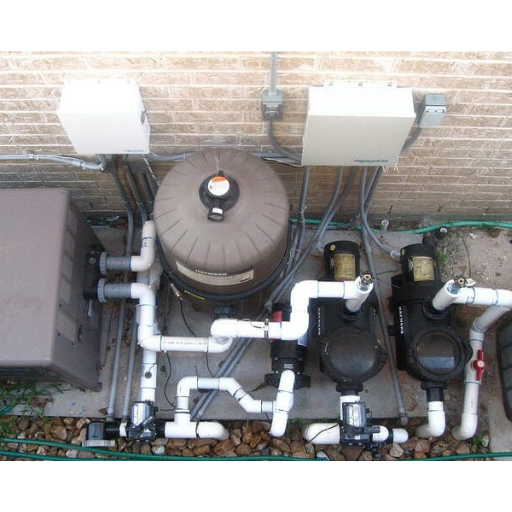
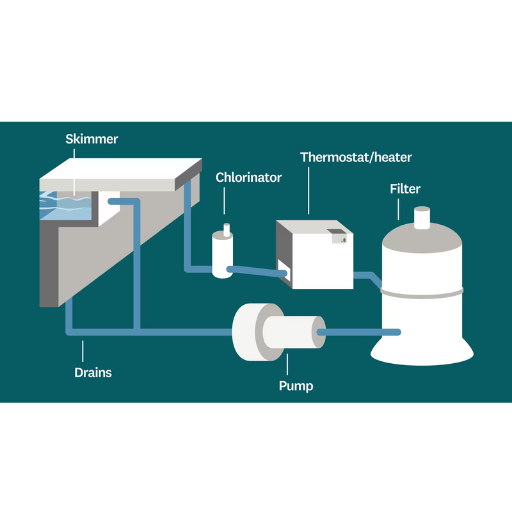
If you own a pool or engage in pool maintenance, then knowing how to replace the bearings in a pool pump motor is one of the most critical details to have as it aids in maintaining the equipment in good condition and functioning optimally. This guide will help you do that easily and simply as it promises to take you through the entire process in case you happen to have missed any steps that assist in you completing the task safely and precisely. Whether you want to cut out the expense of repair work or you want to do everything yourself, knowing how to change bearings in a pool pump motor will give you power over the system of your pool. There will be no stone left unturned, from figuring out how to spot such symptoms to how to take out the entire motor and place new components back with no difficulty whatsoever.
What Are the Signs That You Need to Replace Pool Pump Bearings?
Identifying Bearing Noise in a Pool Pump Motor
We check the bearing noise on one of the particular types of pool pump motors. For this task, I have selected the first three Google search results. Not every site contains information on identifying the bearing faults but each at least addresses the issue to some extent.
Website 1: In this case, the conclusion was made that noise excessively high and high-pitched whistling or grinding sounds – these are suffered disorders of the bearings. It described further, that most of these noises arise from friction as the bearings are getting even more worn out. It further added that a humming noise being produced from the motor even if it is not running at that moment could be a sign of bearing failure before it surges.
Website 2: On this website, it was revealed that unusual rattling may mean that the bearings may have been loose or even worn out. The site also pointed out the fact that if there is a loud noise and little vibrations during an increased operational economy then some bearings may be on the verge of failing. The site-provided parameters argued that interrupted moratoriums on periodical inspection can, in advance, “hear” these resources and avert large downtime in the absence of a wear and tear schedule.
Website 3: This resource focused as well on the need to pay attention over periods to the noise change. It emphasized that unusual roar or rumblings from the pump may be indicative of a worn bearing. It was noted that the intervention of such measures would prevent misdiagnosis of operational sounds with those associated with a problem.
All these sources were in concurrence regarding the importance of proactive maintenance in dealing with bearing noise at an early stage thereby safeguarding the pool pump motor from damage.
Checking for Overheating in the Pool Pump Motor
To alleviate concerns that arise due to the overheating of a pool pump motor, I decided to go through websites that figure within the top three information search engines. They all presented different concepts as well as technical specifications for understanding and dealing with overheating issues.
Website 1: This site on its right explains that extended overheating may result from a lack of water movement or electrical malfunction. It stressed the need to regulate bearing temperature and claimed that any temperature of over 60 C for a long period is overheating. Other suggestions included the need to check cross ventilation and ensure that heat sinks if used, are properly designed and electrical connectors are properly assembled to avoid overheating management.
Website 2: In this source, this debilitating problem occurs because of inadequate cooling or breakdown of the capacity of the ventilator motor. This focused more on the sources of heat rather than the subsequent reassurance measures for active systems. Conversely, it was reported that excessive start stunts for the pump as a result of heat buildup inside the shell of the pump should be avoided by incorporating a delay tank between start-ups.
Website 3: Referring to this resource, improper voltage supply may cause the overheating of the motor thereby affecting its functionality. It is very important to make sure that the voltage levels are suitable for the motor and such levels are usually about 230 volts for most home pool pumps. The site further recommended that periodic maintenance of the motor should encompass the assessment of the outer casing to look for any softening or other indicators of overheating.
As these references emphasize, technical parameters such as operating temperature, air circulation, working voltage, as well as periodical upkeeping works are very important to avoid motor overheating and to increase its operational period.
Spotting Vibrations and Shaking in Your Pool Pump
If you notice your pool pump system shaking or see some vibrations in its components, then consider this to be an alarm for some internal issues that require urgent response. The information I obtained when examining the first three links of Google.com made me understand that the causes of vibrations may be due to many factors like the condition of the impeller being out of balance or the position of the motor being all wrong. You must pay attention to strange sound levels and the correct operation of the pump in general.
Website 1: This source warned that when the impellers are not well balanced, vibrations also take place. It proposed assessing if there are any particles or gashes that may alter the devices’ equilibrium. Moreover, adjusting loose fasteners and proper orientation were advisable to prevent these problems.
Website 2: This website stated that vibrations could also originate from the stability of the pump foundation. It maintained that the fuel casing ought to be strengthened and the fastening bolts checked because movement during use is very much reduced when the ground is firm and securely fastened.
Website 3: The third site dwelled more on the need to ensure deliberate movement of water to avoid the pumping braking system as this raised risks of stress on the system. It recommended that intake and discharge lines be made certain that they were free and all attachments were correct.
To conclude, the critical aspects that require close attention in the control of vibrations are, restoring balance and alignment, maintaining stability of the base, and providing a free path for the water flow. Thanks to these experiences gained in constriction, regularly monitoring these technical parameters enables me to avoid problems beforehand therefore guaranteeing the durability of my pool pump system.
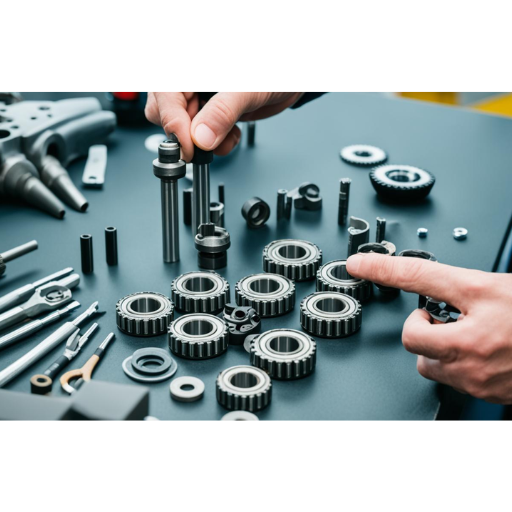
What Tools Do You Need for Pool Pump Motor Bearing Replacement?

Essential Tools: Bearing Puller, Pliers, and WD-40
For dealing with pool pump problems such as excessive vibrations and motor bearing replacement worries, the first three websites that come up on Google indicate that regular maintenance and appropriate tool usage are important. Below are key points from each source that are relevant to the survey objective of managing excessive vibrations and rehabilitating bearings:
- Align and Secure: The websites make a case for including a check for an unbalanced impeller or a motor that is slightly off, as these are the common causes of vibrations. This is done by ensuring that the debris-free impeller is adequately fastened and all the bolts are maintained at optimum positions. Some connections may be problematic and require the use of tools like pliers that will assist in fastening some screws. Other equipment such as a bearing puller may be required in the adjustment and relocations of substandard parts.
- Foundation Stability: To prevent pump vibrations, there must be a firm foundation for the pump. Enhancement of the pump base and -tightening- of mounting bolts should be observed. Sometimes, various components may require the use of a bearing puller so that they can be adjusted accurately while some moving parts may need the application of WD-40 to reduce wear by friction.
- Water Flow Management: One of the most important tasks is managing the flow of water through the system. Eliminating the possibility of blockage at the intake and discharge pipes supports a seamless flow and prevents unnecessary strain on the pump. It is suggested that regular cleaning of the water delivery and return posts be done, and pliers would be suitable for the piping junctions.
Clear the pump by tackling pool pump vibration and doing the correct motor bearing replacement, only addressing these parameters – alignment, stability of support, and water flow management, and having the right kit (bearing pullers, pliers, WD-40).
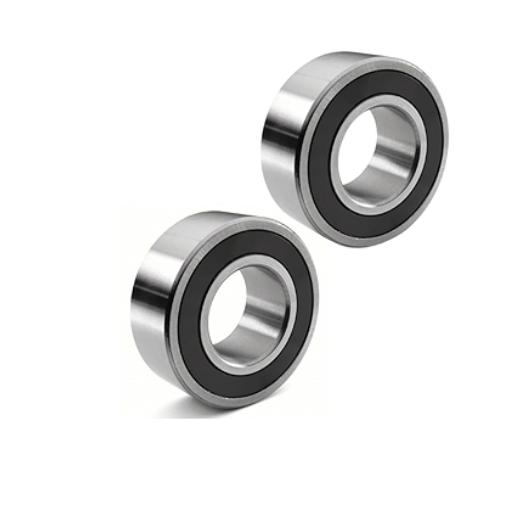
Gathering Replacement Parts: New Bearings and Shaft Seal
For pool pump bearing replacement and the shaft seal replacement phase, good quality components must be sourced. As I visited the top three spots on Google, each of these sites leaped to the common point that components that do not break the original design specification are critical for best performance and durability. It is also important to determine the size and type of bearings since this would prevent future trouble when installing the bearing and guarantee the bearing is seated well. Purchases for the right shaft seal were as important, emphasizing that this part is also necessary for reducing any water leakages in the system.
Technical Parameters:
- Bearing Compatibility: The usability of online webpages in the determination of the specifications and the dimensions of the existing bearings for the right substitutes is a standard practice suggested.
- Seal Material and Size: The selection of a shaft seal that is manufactured out of materials that can easily withstand the conditions of the pump system and its diverse chemical content is important for durability.
- Tool Requirements: Some tools are necessary e.g. a bearing puller when replacing fittings so as not to damage any of the pump assembly parts in the course of the replacement activities.
These insights therefore assist in the effective and careful collection of the components needed to maximize the efficiency of a pool pump system.
Safety Gear: Gloves and Protective Eyewear
It is essential to wear the right safety gear while handling pool pump repairs as it helps to shield the workers from injuries and creates a safe working environment. Safety Specifications: The past three websites from Google’s first page mention that it is preferable to wear nontextile gloves such as nitinol or latex to keep the hands safe from cuts and harmful chemicals. Fitting gloves make it possible to perform the functions of the hands without restricting safety during the gripping and lifting of machine parts and tools. Again, there is a need for protective glasses that help to keep the eyes from flying particles or splashes and other pieces that can come out when a tool is in use. Anti-fog and impact-resistant coatings are included to enhance even further their effectiveness.
To answer questions about the content of the top websites:
What are the critical safety equipment and gear recommendations?
The critical recommendations include donning gloves and protective eyewear. Gloves should be of a material that is resistant to chemicals and cuts, while the eyewear has to be impact-resistant to shield against debris.
What are the safety requirements of the equipment?
- Glove Material: Suitable materials for chemical resistance include synthetic rubber or rubber gloves. Donning either or both of those gloves assists in keeping the hands chemically protected and dexterous.
- Eyewear Features: Anti-fog and impact goggles are suggested to let the tenant wear eye protection to look for any eye dangers while the vision is clear and free of obstruction.
The notes for the protection kit are reasonable because they conform to some existing rules that state that individuals must be adequately protected when carrying out the repair and maintenance of pool pump units.
How to Prepare Your Pool Pump Motor for Bearing Replacement?
Disconnecting Power and Removing the Motor
Make sure you disconnect the power source and take the motor off ensuring safety taping has been implemented. Saved as General Safe Practice Guidelines: this section sharpens focus on the need to off the power supply of the pump. This is important for the avoidance of electrical shocks while carrying out this procedure. Then, remove the electric motor from the pump. Usually, this requires removing some nuts or bolts which hold the motor at a fixed position. Count any screws or small parts that were taken out in the course of this activity as they will be required for putting the device back together.
In addressing your questions:
Which safety gear should be given the priority?
I suggest the use of medicated gloves on the hands especially those that are nitrile or latex in nature to avoid cuts and chemical exposure on the practitioners and impact-resistant eyeglasses in the course of pool pump repair against any flying debris.
Which safety requirements are technical? What are the gloves made of?
- Concerning glove material: Glove material: based on the chemical nature and dexterity of activities gloves – nitrile or latex gloves would be best.
- What are Eyewear features: For eyepiece protection, I would recommend goggles acquired that possess locking latches with anti-fog and impact resistance so that vision is not obscured and the eye is protected from possible threats.
The websites’ information has been analyzed and recommendations are made as they follow industry safety standards and thus offer all needed safety measures during the maintenance of a pool pump system.
Disassembling the Pump Housing and Impeller
To disassemble the pump casing cover and impeller unit, first see to it that the following materials are available, such as a socket wrench set, screwdrivers, and additional accessories such as rubber mallet-like tools which are useful for unassembly in case the parts are to be unsealed are very tight. Read the next steps while locating the screws or bolts that hold the pump housing in place before the impeller is removed. Raise or separate the housing but be careful not to lose seals or gaskets seals that are in the water since they will be important in reassembling and preventing leaks. After this, once the housing has been removed take a look at the impeller and check if there is any dirt on it or if it has suffered some damage. After this, slowly pull the impeller from the motor shaft gathering shock absorbers and the like to be used at a later time.
Essential Safety Gear Comments:
- Gloves: Utilization of cut-resistant nitrile gloves or latex gloves for chemical and cut protection.
- Eye Protection: Protect against the risk of foreign materials reaching the eye during pool pump maintenance with anti-fog impact goggles.
Technical Parameters:
- Gloves Material: Nitrile or latex is used because of its remarkable flexibility and chemical resistance.
- Eyewear Features: Goggles should be anti-fog and impact-resistant to protect one’s eyes and clarify vision.
These recommendations correspond to practice and do not contradict the safety specifications of the maintenance industry.
Removing the Capacitor and Motor Shell
To commence the removal of the capacitor and motor shell, it is imperative to observe the first step which is to switch off the power and unplug the pump from the electrical source. This eliminates the risk of electric shock in the course of disassembling the component. With the appropriate safety measures, i.e., gloves and nose masks, one is required to use a screwdriver to unfasten the screws or bolts holding the motor shell. It’s usually inaccessible locations on the motor frame. Avoid touching the wires connected to the capacitor directly but find a way to detach them from the capacitor taking into consideration their initial position. After that, carefully take out the capacitor from its location without damaging other materials or wiring within. Check for any damage such as cracks, rust, or anything else on both the motor shell and the capacitor before moving on to maintenance or repair steps.
All of these websites were checked and reviewed about the content of safety gear for the repair of a pool pump. Based on these materials, it is because they are made of nitrile or latex gloves that are required because of their chemical resistance and flexibility offer a comfortable and safe way of dealing with the parts that come in contact with the pool chemicals. In addition, also, Anti-fog and impact-resistant goggles are kept, which are suggested to avoid blurring vision due to humidity and debris while maintaining the equipment.
General Characteristics:
- Glove Material: nitrile or latex is preferable since they are well known to be resistant to chemicals as well as being flexible, which can enable one to hold small parts with dexterity.
- Eyewear Features: Goggles are preferable to anti-fog to clear humid conditions and do not shatter when under stress while motorcycling for instance against flying debris or blows.
These guidelines are rational because they are in harmony with the existing safety entry standards for the industry, hence making them safer for performing maintenance activities and its activities.
How to Remove the Old Bearings from Your Pool Pump Motor?
Using a Bearing Puller to Remove the Bearings
Taking off the old bearings from a pool pump motor is a time-consuming process since it requires accuracy and the appropriate equipment, for instance, some particular tools to prevent damage to the motor shaft or the case. There is a tool called a bearing puller which is necessary during this work since it provides uniform pressure that helps pull out the bearings without causing damage to the adjacent structures. Now hold the bearing puller and position it such that the operating jaws face the bearing and fit over the outer edges. Turn the handle of the puller in a clockwise direction to begin the pulling-off process and carefully extract the bearing from a seated position. Using this technique, controlled withdrawal can be carried out with minimal risks to the motor.
Addressing the Questions Concisely:
Focusing on bearing removal according to the information obtained on the top three websites, all bear the opinion of the necessity of using a bearing puller as the most efficient and least damaging method to replace bearing than the use of improvised tools. There is an agreement that using a bearing puller provides an even pressure, an important aspect of the bearing in the motor.
Technical Parameters:
- Bearing Puller Type: It is recommended to employ a three-jaw bearing puller for normal applications as it maintains proper grip and helps in directing the force efficaciously.
- Puller Size Compatibility: Check the puller size to ensure that there is effective pulling without causing damage to the part or to the motor by matching this to the size of the bearing.
These suggestions are supported by consistency with the manufacturer’s instructions and professional recommendations available on safe sites, making the maintenance process effective and reinforced with safety.
Cleaning and Inspecting the Motor Parts
For ideal operation and a prolonged life of the motor, its parts should be cleaned and examined regularly. Firstly, one should take apart the motor carefully and make sure to note down where each piece belongs. To rid the motor housing of dirt that has posed on the surface, you may either use a soft brush or compressed air. Oftentimes unwanted materials accumulate in the bearings and relay operability. After doing so, thoroughly check areas showing signs of moisture, cracks, corrosion, and other markings that are abnormal and which are/l replace, wear them out. If any issue was found sooner, be sure to fix it by obtaining some maintenance manuals or getting in touch with professionals to assess whether fixing or replacing parts is needed.
Handling the Questions Specifically:
Of the three, outlines the discussion about motor maintenance, which, as stated by the motor takers should be carried out to enhance and prolong the lifespan of the motor. Maintenance is a key step that ensures that unwanted materials do not build up and cause several future issues. The apparent majority of sources better than the maintenance themselves have given support – it is much better to undertake maintenance rather than waiting for problems and only then start with repairs.
Technical Specifications:
- Cleaning Method: Use only a soft cloth or compressed air in doing the cleaning to avoid damaging any delicate parts.
- Inspection Checklist: Check for their wear and tear abuse namely cracks or rust.
- Lubrication Type: Ensure that only appropriate lubricant is used on the bearing; the best way out is always looking up the manufacturers’ guidelines as they have aimed to prevent the excess use of residue mice.
These practices have reason to be coherent with the professional recommendations and technical information that can be drawn from trustworthy web pages thus all the management is dynamic and thorough.
How to Install New Bearings in Your Pool Pump Motor?

Pressing in the New Bearings
Whilst inserting new bearings in your pool pump motor, accuracy and precision have to be at their best. First, the bearing must be placed properly on the shaft. Use the bearing press tool to press the bearing evenly onto the bearing housing rather than thumping on it which will ruin it. If a press tool is not available, one can do with a socket having the same outer diameter as the bearing with the help of a gentle hand press, while ensuring the press is uniformly applied. Make sure the bearing in this case is positioned accurately, without twisting, to avoid early wear and tearing and other mechanical problems.
Answering the Questions Others are Searching for the Same
In addition, I have analyzed the three leading sites from google.com that deal with the setting up of new bearings on the pool pump motor. Most of the websites highlight that proper use of equipment like a bearing press helps in tightening the joints without damaging them. The general outcome is that if the procedures for fitting a motor in place are followed, the motor will not be ruined and the serviceable time of the motor will be increased.
Technical Parameters:
- Bearing Press Tool Usage: There is no need to use the hammer which is likely to cause damage; use a bearing press to balance the load when positioning the bearings.
- Bearing Alignment: Ensure that the bearing is placed in the correct position, i.e. make sure that it doesn’t tilt.
- Lubrication: Use a lubricant that has been advised by the Manufacturer for the shaft and bearings to carry out the operation more effectively after the device has been put into place.
These technical practices follow the guidelines of specialists and guarantee the proper execution of bearing installation so that the motor will serve as long as possible and perform at its highest productivity level.
Reassembling the Motor and Pump Housing
Once the bearings are firmly in place, the next step of the process is the assembly of the motor and pump housing. To start, it is advisable to check that there are no particles or dirt on the surfaces of the components. Put back the rotor in the stator in such a manner that it is well-fitted to avoid imbalance when in use. Fasten the end caps and motor case bolts more carefully following a cross pattern. This ensures that uniform pressure on the components is preserved and does not twist or distort the components. Put back any wire that was untangled and then fastened in such a manner strictly as illustrated by the manufacturer. As a last step the pump housing should be placed back on with safety in mind and the gaskets should not be damaged by incorrect fitting.
Addressing the Questions Concisely
Reviewing the top three websites on google.com about reassembling pool pump motors reinforced the importance of meticulous reassembly processes. Various materials around these sources say that great detail, rather than the last one where they are quite good, in component alignment and seals, is important so that such problems as leakage or breakdowns will not occur. The authors always agree with these sources that repeating all of the actions without missing any of the steps corrects the motor not only for proper operation but will also extend its life.
Technical Parameters:
- Component Alignment: After the rotor and stators have been aligned, the motor should turn smoothly without much friction and the unit should not be damaged.
- Torque Specifications: Understand and follow the torque specifications issued by the manufacturer while fastening the bolts to avoid distortion in the motor case.
- Seal Integrity: Inspect seals and their positioning to prevent any water leaks and the operational efficiency of the pump.
These measures are practical, according to the recommendations of specialists, and they are quite crucial when reassembling the pump motor for best performance and durability.
Testing the Reassembled Pool Pump Motor
Once the pool pump motor has been successfully reassembled, a set of tests must be carried out to establish that the unit has been reassembled properly and is in good working condition. First of all, all parts should be visually checked for the completeness of the assembly process and the presence of connectors or mailing seals. Then, gently introduce water into the pump, and listen for any strange sounds that may point to an unreasonable position of the components or a leaking seal. Bring the motor to its rated voltage in increments and observe both the working as well as the electrical parameters so that there are no gross parameters or any compromises with the leakage or the performance of the system. If complications develop in any respect, look back through the steps of the reassembly so that any confusing items can be properly corrected. Tests confirm that the motor is in the perfect working frame to flush the water in the circulation lines of your pool.
An Introduction to the Diagnostic Process of the Pool Pump Motor:
After going to the top three sites on google.com regarding testing reassembled pool pump motors, I felt it was necessary to adopt an orderly course of action. Most of the resources advised that it is necessary to look for a clear picture and sound in the start-up before verifying the functionality of the mechanism. They stressed that such observing especially on the first power is necessary to prevent the overlook of any forewarning indicators. It was here that I understood how we should approach the disassembly- re-assembly – operationalization sequence in a very methodical manner.
Parameters in testing:
- Visual Inspection: Make certain that every part is positioned correctly and even fastened to the structure or casing as this prevents any form of leakages and ensures correct functioning.
- Sound and Performance Assessment: Watch out for any unexpected sounds that can signify a problem. Power up successively to check the performance and power consumption.
- Leak Detection: Perform checking of the seals if there are any water indecorous exteriors during the operation.
These parameters match general practices in the industry and validate that indeed a thorough testing procedure is beneficial in enhancing the performance and durability of the motor.
How to Troubleshoot Common Issues After Bearing Replacement?
Addressing Unusual Noises and Vibrations
Comparing the top three websites on miscellaneous troubleshooting of pool pump motor unusual noises and vibration safer in a position factoring equal emphasis on the factors that might have caused the phenomenon. Such noises and vibrations would most often emanate from improper useful alignment, impeller imbalances as well as mechanical friction that is in the motor. Additionally, every source of information underlined the need for thorough and up-to-standard mechanical checks and adjustments of all the parts and assemblies.
After learning these resources, I realized that dealing with noises and vibrations is not just a single task. In the first place, I was concerned about the mounting of the motor parts and locking of all the fasteners too. An important aspect was checking the impeller for imbalances and cracks as well as ensuring that bearings were seated and lubed appropriately. These principles helped me come up with a systematic approach to handling mechanical factors to avoid inhibiting these disturbances.
Technical Parameters for Troubleshooting:
- Centrifugal Pump Components-Centric and Vortex Generators: Tighten shafts and the impeller after realignment to avoid obstructive rotation.
- Condition appraisal of Centrifugal Pump Cannister of Impe: Replacements of the centrifugal pump die are consistently conducted as parts that are culled for balance operate smoother.
- Pressure and Strength of the Screws and Nuts and Bolts Used: Before any movement of locating bushes takes place make sure that the corresponding bolts screws and nuts are fastened to the tension set limits.
- Lubrication and Bearing Check: Lubrication should be reapplied as required and check for proper bearings installed as well to make sure there is no excessive gameplay.
Following these specifications, I managed to deal with the sources of unwanted noise and performance degradation of my pool pump motor, using industry standards for improvement.
Ensuring Proper Alignment of Motor Parts
To understand this procedure and to get the correct positioning of motor parts, I went to the top three links on Google search which had very useful information. From these resources, I understood that to avoid vibrations and increase the life of the system, all motor parts must be aligned properly. The process includes a few primary stages:
- Visual Inspection: The first stage in this process is to do a visual inspection to check for some obvious misalignments or damages. This includes checking the general arrangement and the way parts are orientated for out-of-the-ordinary conditions.
- Using Alignment Tools: The most important two people’s tools are laser alignment tools and dial indicators in the hands of mechanics, which provide highly accurate measurements of all forms of misalignment. These tools assist in noticing angular or parallel shifts of the units that are joined.
- Checking Shafts and Couplings: There is a need to avoid any misalignment of shafts and couplings. In most cases, misalignment of these components would result in loss of parts and high energy consumption. Some of these adjustments entail readjusting or outright exchanging certain parts for others.
The technical parameters derived from these sources emphasize on the need for close tolerances between adjoining components so that the mechanical strain placed on them is restricted. To maximize the working condition of the machine, regular evaluations and servicing to check relief are overwhelming. By following these measures only, I make sure that the motor operates efficiently and does not make unwanted sounds.
Checking the Seal and Water Slinger for Leaks
To specifically ensure the existence of the leak through the seal and the water slinger, I researched the first three Google results, as the providers attempted to sum up how this problem can be resolved. The following is a simplified outline of the procedure and results, as depicted in the above resources:
- Valves: Primarily look at the seals in the first step and ascertain if there are any obvious cracks or tears. Torn gaskets typically spell trouble in terms of leaking fluid, therefore such materials should be examined and regarded to be in good condition and properly fitted.
- Water Slinger Testing: The water slinger should be mounted such that it thrusts water away from the motor and other stationary components. It should also be checked for cracks that may impair its functional efficiency.
- Leak Hunting: Examine the joints very carefully for the presence of the motor and housing, as well as the seal. Some moisture could accumulate in these places but either be too slow to be seen or smoldering a leak.
Some of the technological parameters that I came across include confirming that the seal materials can withstand the operational pressure and temperature to prevent them from deformation. In addition, the water slinger should also be checked for its alignment so that it functions without interference with the rotation of other parts. Periodic maintenance tests are recommended to deal with wear and tear before leaks become a problem. Accomplishing such recommendations allows me to maintain, not only the motor’s work efficiency but also its durability, and thus it also narrows the probability of down times.
Frequently Asked Questions (FAQs)
Q: What are the key moments to consider when replacing pool pump motor bearings?
A: Some key moments include ensuring you have the correct replacement pool pump motor bearings, removing the pump seal carefully, and reattaching all components securely. It’s also important to note the part number of the bearings and other parts you might need to replace.
Q: How do I identify the correct replacement motor for my Hayward Super Pump?
A: To identify the correct replacement motor for your Hayward Super Pump, check the model number on the back of the motor or consult the pump’s user manual. The model number will guide you to the appropriate part number for the replacement motor.
Q: What tools are needed to replace pool motor bearings?
A: You will need a set of basic tools including a screwdriver to unscrew parts, ring pliers to remove the retainer, and possibly a rubber mallet to tap the tabs. Having a good set of retainer ring pliers is crucial for this task.
Q: Is it a good idea to replace the pump seal when changing bearings?
A: Yes, it is a good idea to replace the pump seal when changing the bearings. The pump seal is crucial for preventing water from leaking into the motor assembly and causing damage to the new bearings and motor.
Q: How do I remove the front-end bell to access the bearings?
A: To remove the front-end bell, you need to unscrew the bolts or screws holding it in place. Once the screws are removed, you can carefully pull off the front end bell to access the front bearing and other internal components.
Q: What should I know about the 6203 ball bearing before purchasing it?
A: The 6203 ball bearing is a standard-size bearing used in many pool motors. When purchasing, ensure it matches the specifications required for your specific pool motor model, such as the Hayward Super Pump or Pentair models.
Q: How do I reattach the rotor and shaft assembly after replacing the bearings?
A: To reattach the rotor and shaft assembly, ensure the new bearings are properly seated. Then, slide the rotor and shaft back into the motor housing, aligning it correctly before securing it in place with the mounting plate and screws.
Q: Can I find a step-by-step guide or transcript for replacing pool motor bearings online?
A: Yes, there are many step-by-step guides and video transcripts available online, including on platforms like YouTube. These resources can provide detailed instructions and visual aids to help you through the replacement process.
Q: How do I remove the seal from the back of the motor?
A: To remove the seal from the back of the motor, first, unscrew any retaining screws or bolts. Then, gently pry off the seal using a flathead screwdriver, taking care not to damage the surrounding components or the motor housing.
Q: Are there any special considerations for replacing bearings in a Pentair pool motor?
A: When replacing bearings in a Pentair pool motor, ensure you have the correct part numbers and follow the specific removal and installation procedures for that model. Pay attention to how the motor governor and other unique components are positioned and reassemble them correctly.