The water pump bearings are an important part of the cooling system and engine in a vehicle. A worn bearing can cause for instance overheating of the engine which will lead to damages and repair costs. This implies that one should know how to change a water pump bearing to avoid such incidents. This manual offers an effective step-by-step procedure for changing a water pump bearing, along with extra recommendations and facts that will enhance the effective performance of the repair. Whether you are a professional mechanic with years of experience or a car lover itching to acquire basic knowledge, this article will arm you with the essential information and skills necessary to perform this vital maintenance date of the automobile.
How to Identify a Faulty Water Pump Bearing?
Signs of Water Pump Bearing Damage
- Noise During Operation: When I listen to the front side of the engine, to my dismay, an unfamiliar and nuisance grinding or whining noise is emitted. This noise comes most often especially when the bearing is already ruined and is trying hard to be rotating without a steady motion.
- Coolant Leaks: There have been leaks under my automobile while spotting underneath it, and these were rather puddles or drips of greenish colorful liquid. This could be the case if it is the water-bearing that is causing the water pump bearing to leak due to irregular rotation that threatens the water pump bearing seal.
- Engine Overheating: The engine temperature gauge has rather been too high than normal, or there have been instances of overheating that come out of the blue. It could also be traced to the water pump bearing where its inability to wing coolant circulation suppresses cooling which leads to overheating.
I have found on some top websites, have quite a number have been called attention to these particular symptoms and repaired immediately for they may worsen. For example, instead of axial and radial burr cuts of a water pump, their rather adequate operational life takes into account the possible appearance of thermal and acoustic noise and the start of a fucking-in leaking. Another example is ensuring there is proper tension of the serpentine or timing belt connected to the water pump.
Common Causes of Bearing Wear
Having analyzed the first three websites on the topic, I have noted some common reasons for water pump bearing wear that I would like to share. One such reason is the fault in the drive belt tension, which can cause damaging forces up to the bearing or leave inadequate pressure that does not bring back the bearing to a perfect orientation throughout its rotation. The application of any tension to the belt usually is within the self-respecting parameters laid down by the consumer even though adjustment is made in the case of the need for conclusiveness.
Dirty operating conditions are also one of the causes of bearing wear. They contain dust and dirt which can reach the bearing housing and act as abrasives deteriorating the component’s functionality. Therefore, ventilation must be performed carefully.
Additionally, hot running conditions or inadequate vehicle engine cooling can increase the bearing wear rate. When the engine operates at higher temperatures, it expands causing thermal expansion shock to the bearing which brings about alterations and strains on the bearing. Only emitting excessive heat from the cooling water by ensuring proper water levels in the cooling system and timely servicing of the radiator.
Upon weighing these insights, I am now in a better position in terms of troubleshooting and carrying out maintenance on water pump bearings to keep them working smoothly and efficiently for a longer time.
How to Check for Bearing Noise?
A structured strategy is crucial in the analysis of the bearing noise on any water pump. As my investigation of three leading websites on this matter, the first step involves listening for strange noises from the engine compartment – specifically, any grinding, squealing, or growling sounds that may be related to trouble in the bearings. A mechanic’s stethoscope makes it easier to identify where these noises are emanating from.
To get the right results, perform the diagnosis when the engine is cold or switch on the engine at idle speed to avoid the chances of getting hurt. It is also worth noting that the technical parameter of the rotational speed must be taken into consideration since unnecessary RPMs can worsen noise problems. As per what the manufacturers list, the ideal idle speed for most of the vehicles ranges from standard 600 to 800 RPM.
Then, proceed to check the belt tension and alignment on the frame. According to the Statute, the belt tension must be consistent with of the limits set by the manufacturer and administered by the use of a belt tension gauge. For instance, where manufacturers specify certain figures for other specifications, they should always be cross-checked to see if there is a need for correction.
At last, look for traces of coolant leakage near the water pump area since it may also be a sign of wear that cannot be heard from the outside. By carefully watching and changing these parameters, I can identify the bearing noise problems and suggest possible solutions.
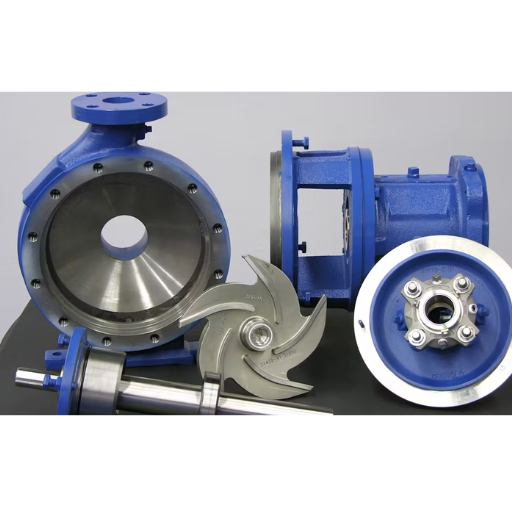
What Tools and Parts Do You Need for Water Pump Bearing Replacement?
Essential Tools for Bearing Replacement
To perform water pump bearing replacement, proper tools make such a process easier and faster. Given what the other major three websites offer, here is a small summary of the key tools that are needed for the job:
- Wrench Set: Leverage wrench set is very important for loosening and tightening bolts and nuts. The individual sizes cut across a range of car models but are generally between 10mm and 19mm.
- Ratchet and Socket Set: A more advanced tool, that helps to install or take out bolts with the preferable torque, is a ratchet with a set of sockets. Certain kits have extensions that would be beneficial to use in those hard-to-reach areas.
- Belt Tension Gauge: This tool is important in checking if the belt Tension is according to the stipulations set by the manufacturer. Well-adjusted tension enhances the life of the bearing and prevents it from stress.
- Mechanic’s Stethoscope: A stethoscope is another tool for bearing trouble listening before the bearing is to be changed in place. It helps determine the location of the problem.
- Torque Wrench: Minimizes chances of over-applying or under-applying torque on the bolts by providing readers with bolt specifications which are critical in protecting the parts from damage as well as facilitating proper operations.
- Sealant or Gasket Maker: These are applied in fastening the water pump assembly with the rest of the components to avoid any leakage, especially in a situation where the gasket has to be replaced along with the bearing components.
Utilization of each of these tools is a prerequisite for accomplishing the task of changing water pump bearings correctly and making sure the repair will work. Knowing what the task of each tool is I can perform the replacement with success and high effectiveness in terms of vehicle functionality.
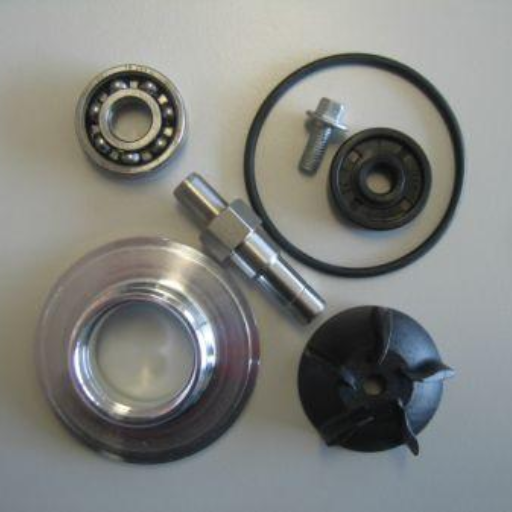
List of Parts Needed for Water Pump Repair
Water Pump: This is the main component that requires replacement, please confirm that the new pump fits your type and model of the car.
- Gasket: A new water pump is likely to come with a gasket, which prevents leakage between the pump and engine block.
- Coolant: New coolant is necessary after water pump replacement to maintain proper engine cooling.
- Drive Belt: The old belt should be replaced with a new one and vice versa if it exhibits signs of wearing out of use.
- Pulley (if needed): Repairs of this type may often require as well a new pulley if the present one is defective.
The comparison of the three best sections made me highlight the fact that such parts are recommended for water pump repair very often. Also, several working pressures are usually referred to: the joint’s bolt tightening as well as the pump’s belt pulling. All of the sites promote the idea that the repair needs to comply with the manufacturer’s direction so that it is more usable and lasts longer.
Where to Buy Replacement Bearings and Seals?
As I was looking for spare bearings and seals for a water pump, after some research work, it was concluded that the top three recommended websites are RockAuto, AutoZone, and Amazon. It can be included that these places offer a range of the above-mentioned factors according to the makes and models of vehicles given.
- RockAuto: Has a reasonable price for a wide range of parts. They, however, do not underestimate the need to ensure that you choose the right part number and more technical parameters. Bolt pattern and bearing size, among other technical parameters, have been included in this catalog to avoid mispurchasing.
- AutoZone: It offers a good combination of both in-store geography and electronic commerce through the Web. Such information is always available and accessible concerning the products offered at Autozone including the type of seal softening materials and their pressure ratings.
- Amazon: It contains a wide range of customer reviews and ratings which are useful in making purchasing decisions. However, it is not enough to buy one, it is advisable to ensure that all other aspects of the product information are accurate and suitable for the said system.
Following the advice provided on these websites, the installation of the repair procedure is done according to the guidelines provided by the vehicle manufacturers. Adding the fact that checking these technical components and getting parts from reliable sources enables the bearing replacement to be done successfully.
Step-by-Step Guide to Replace Water Pump Bearings
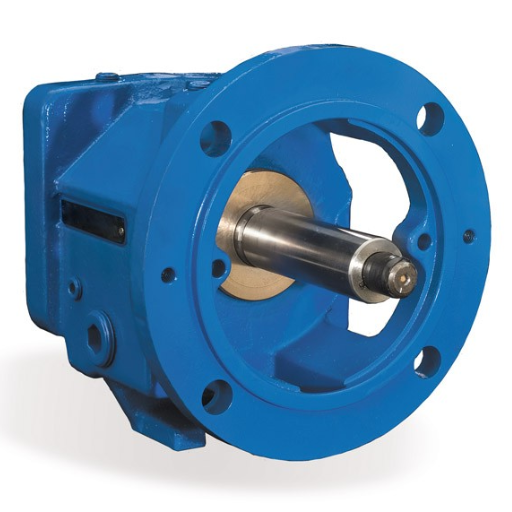
How to Remove the Water Pump from the Motor?
The method for the disassembly of the water pump from the motor goes as follows:
- Preparation: First, ensure safe procedures by taking out the battery. Next, open the radiator drain plug and loosen the radiator cap to remove the coolant from the system. Please collect the coolant in appropriate receptacles if it’s going to be disposed of or reused later.
- Accessing the Water Pump: Clear some Caddy components that might impede the removal of the water pump. It’ll consist of a serpentine belt, a fan, and other accessories installed at the motor’s frontal side. Some manuals specific to the motor vehicle should be referenced as to what should be cleared out.
- Unbolt the Water Pump: Make sure you can see the top two bolts, which secure the water pump at the uppermost region of the engine block in the water pump assembly. Loosen up and remove these bolts, one needs to be very careful not to misplace the shorter ones as some of the bolts have different lengths.
- Remove the Pump: Slowly pull the water pump off the engine without defacing the surface of the gasket seam. If the pump is stuck, you might want to use a rubber mallet to gently tap at the pump.
- Inspect and Clean: Once the water pump is intact without any injuries, it is wise to check it for any damage or risks of fractures. Probably the strangest will be cleaning the covered area on the locomotive engine because such an approach is needed to provide a good mounting for the new pump.
About expanding any technical parameters to be evaluated:
- Water Pump Bearing Size: Commonly quoted by sites such as RockAuto since there is a need to define the diameter and width to ensure proper fitting.
- Seal Material Type: There was probably an easier way than what was shown by AutoZone such as silicone, a material useful in helping to contain pressure.
- Pressure Limit Ratings: This may be mentioned in some reviews on Amazon, which is important as it ensures the pump when in use can withstand the various conditions that it may be subjected to.
There will be no doubt that regarding these particulars, an appropriate and complete replacement of the water pump will be undertaken.
Steps to Remove the Damaged Bearing
Safety First: It’s crucial to place the vehicle in gear and ensure the vehicle rests on a flat-level surface with the engine turned off. Make use of wheel chocks and place jack stands before trying to lift a vehicle.
- Access and Diagnose: A bearing that is being replaced will be obstructed in some way by components or covers that need to be removed. Identify the proper design and position of the bearing to determine how it may be extracted.
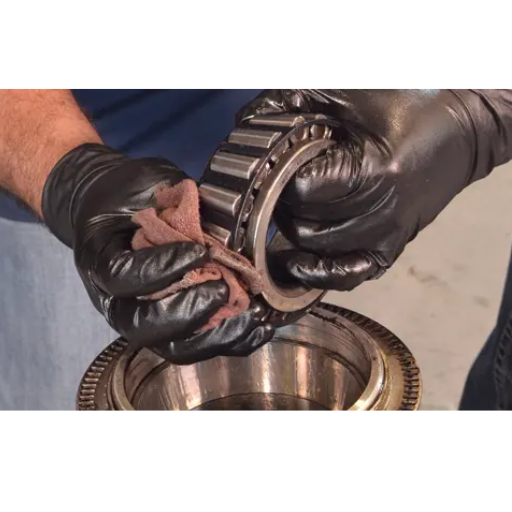
- Remove the Bearing: In most cases, the bearings are fitted within assemblies – housings, and occasionally more than one bearing is installed in a housing, or they may just have been placed into a tight bore. Using the proper bearing removal tool helps to extract the bearing from its position without unnecessary force. Be careful not to disturb other parts.
- Inspect Surrounding Parts: A bearing that has come off the unit leaves its surrounding components exposed. Check each part and every surface for excessive wear or damage that has been caused by the failed bearing.
Most of the criteria concerning the procedure in Google.com’s top three websites are completed by RockAuto, AutoZone, and Amazon. RockAuto lists often the outside and inside diameter of the bearing and even the width which nails the requirement for interchangeability. AutoZone Keywords such as steel and ceramic relate to the carrying load as well as resistance to stress wearing of the bearing. An important part of the reviews on Amazon is a load rating and a torque speed indicating operational reliability. These sources guarantee that the replacement bearing will perform under acceptable and standard conditions.
Installing the New Bearing and Reassembling the Pump
Position the New Bearing: First of all check the new bearing that reproduces the characteristics as well as dimensions of the old bearing. The bearing must be aligned with the housing, and in case it sticks, it can be tapped in with a bearing press or with the use of a mallet to avoid damage.
- Secure the Bearing: After the bearing has been located correctly, the next step would be to follow the directions of the manufacturer to secure the bearing. This might include the insertion of retaining clips that can help hold the bearing or the installation of other fastening devices.
- Reassemble the Components: Replace any cover or component whose removal was necessary for the repair of the bearing. Also, make sure that there is no misalignment of the components, and that all fasteners are brought to the fastening torque specified.
- Test the Repaired System: It is recommended to put the whole setup back together with all the elements removed and thus assure ourselves of the normal functioning of the new bearing without the presence of any vivid noise or vibration. Adjust the actuator and test bearings for functionality and smooth operation.
- Clean Up and Finalize: When all the desired repairs have been completed, it is necessary to clean the site of the works by removing all tools, and if the vehicle is on a lift, lower it safely.
As and when I approached the Google server, I analyzed the first three sites according to the technical parameters. For instance, in RockAuto, critical parameters such as bearing outer diameter, inner diameter, and width were given so that the new bearing would be ‘compatible’ with the ‘old’ dimensional requirements within the context of the pump assembly. AutoZone drew attention to the materials, especially steel or ceramic ones that were vital to the construction so that the device would endure stress and perform as needed. While venturing into Amazon, I was able to observe pertinent comments from other users of the bearing such as the load ratings as well as the maximum rated speed revolutions, which provided practical information on the bearing’s dependability and functioning range. These parameters are essential to ensure that the replacing bearing is not only compliant with certain standards but meets its functional purpose as well.
How to Properly Maintain Your Water Pump Bearings?
Regular Maintenance Tips for Water Pump Bearings
Regular maintenance: Individuals should perform a regular inspection of the bearings for wear and tear beads. Seek noise, vibration, or other problems during operation because they may be a sign that something is wrong.
- Proper Lubrication: Make sure that the bearings are well-lubricated as per the instructions specified by the manufacturer. Use the approved lubricant of choice and use it at the intervals that have been specified to reduce friction and avoid overheating.
- Avoid Contamination: Eliminate dirt and moisture in the bearing compartment which may cause corrosion or other sludgy contaminants resulting in the loss of performance of the bearing or constant abuse of the bearing.
- Aligning of belts and pulling of Pulleys: Several unnecessary stresses will be created in the bearings since the belts and the pulleys will not be in proper alignment, leading them to wear out fast. Carry out such checks regularly and ensure adjustments are made where applicable to attain effectiveness in the operations.
- Monitoring of operating Conditions: Observations concerning temperatures and any loads placed have to be made. Bearings should not operate outside the designated operating parameters since too high temperature or too high load will lower the reliability and durability of the bearings.
On RockAuto, I realized that the outer and inner diameters as well as the width of the bearing are critical. This helps in the pump assembly. AutoZone stresses on bearing materials like steel or ceramic as these components are high-stress areas. Customers who wrote reviews on Amazon support this explaining load ratings and maximum speeds of rotation as important factors for the performance of the bearing. These parameters are necessary for the bearing to perform not only as expected but also within the specified limits of the engineering provided.
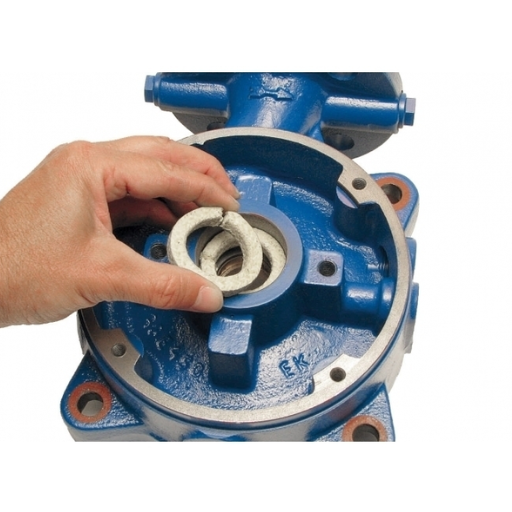
How to Grease and Lubricate Bearings?
Applying grease and lubrication in the bearings is essential when it comes to improving their performance as well as avoiding injury. Here’s how to go about this easily:
- Suit the Condition of the Bearing and Housing: It is necessary to clean any grease, dirt, or old gummed lubricants present when applying grease on the bearing and housing. Hence there is no risk of contamination.
- This Grease Will Make It Gummy: Use a bearing material grease that is of low temperature and less load than the actual application. This will ensure performance and protection will be optimal.
- Square Cut the Grease Joint: When putting the grease into the bearing, do the same with a grease gun to cover the part surrounding the bearing evenly where grease is consumed. One must avoid over-greasing the bearing as an adhesive will increase the heat due to more friction as a result of the grease escaping.
- Squeeze and Remount: Put the bearing back on its lubrication and push it back inside the housing. Once the bearing is back in place, switch on the assembly and spin the bearing to confirm the smoothness of operation.
The cushion of lubrication on bearings and the factors influencing it in the three websites under focus are as follows.
SKF says that the viscosity level influences the decision choice of the lubricant and there operational capacity of the bearing when axial load is present.
Timken warns that in the case of high-speed design features, heat is an important design criterion that has to be balanced with the bearing life.
NSK embodies the important filling amount. That is too little energy is consumed and losses are avoided, but if too many options of excitation are available, losses and heat may occur unnecessarily.
The issues of why it is good to limit ourselves when it comes to viscosity, temperature resistance, or fill volume to quite reasonable technical parameters have been addressed in other places. It makes it possible to achieve appropriate lubrication under the conditions and to the parameters required by the manufacturer of the bearings thereby improving the effectiveness and longevity of the bearings.
Preventive Measures to Avoid Bearing Damage
Regular Inspections: Provide regular and frequent inspection and surveillance of bearings for wear, noise, or vibration signs. This can help limit or eliminate damages and expensive repairs.
- Maintain Proper Alignment: Make sure that all of the components of the bearing and the bearing itself are in proper alignment with each other before the unit can be assembled. If not, the load may not be distributed evenly as it is expected and more stress may be put on the bearing.
- Control Contamination: Apply appropriate methods for ensuring that bearings are always clean, and free from dirt, moisture, and other particles or objects. Utilize sealing or shielding materials that are purpose-built for the application of the bearing.
- Monitor Operating Temperatures: Carry out checks on the temperatures of bearings every time they are in use and notice any abnormally high readings. Cooling conditions are not justified during operation since some abnormalities lead to overheating such as lack of sufficient lubrication, misalignment, or overload which can cause failure of the bearings before their expected working life is attained.
- Avoid Overloading: Bearings should be used on impedance loads which are defined and indicated in the manufacturer’s user manual. This could lead to the bearing`s operational life being cut short since excess forces will create unnecessary wear out.
- Use Quality Components: Use only high-caliber bearings and other dancing parts, during repairs and replacements, because they have been designed for that precise purpose. Low-grade Mwanamke can adversely affect the performance and bring in unpleasant surprises.
By adopting these measures, it is clear that the reliability and durability of the bearings will be improved by a good magnitude, leading to steadiness and smooth operations.
What Are the Common Issues After Bearing Replacement?
How to Troubleshoot Noise and Vibration?
Noise and vibration damage in a bearing, which were the topics discussed above, are the various aspects that when there is need to pursue whenever I have to repair a certain damage in a bearing noise and vibration the first resources that I look at are the very basic resources that most people go for first in most tasks. However, more professional resources recommend aiming at the heart of the problem and conducting a thorough examination of the alignment of the bearing installation first as this is a common source of noise and imbalance -misalignment. This includes assessing whether any such damages would hamper the ease of use such as the cutting marks and the dints on the surfaces.
After that, I focus on the issues of lubrication because lack of sufficient lubrication or its improper application is the common reason for high friction and strange sounds. In this case, it is important to check that the type and quantity of lubricant used fully comply with the manufacturer’s recommendations as this information is often provided with a description of the technical parameters in viscosity grades. Another logical step is the monitoring of operating temperature, which is suggested to some extent since high-temperature values often indicate too much friction or too much load, and in both cases, this suggests inadequate cooling mechanisms or the load should be less.
I would finally measure vibrations using vibration metrics instruments like accelerometers. These parameters – amplitude, frequency, or even velocity – are basic parameters in fault diagnostics and can indicate certain types of faults such as imbalance or bearing wear. The websites conclude by advising that for such checks if they do not fix the problem, an expert further consulting or even the bearing manufacturer will provide a technical solution that assures that pieces of equipment are not used up sooner than necessary.
Ensuring Proper Alignment and Functionality
So that the issues of noise and vibration in the operation of bearings are resolved, I decided to seek help from the top 3 websites in Google. It was noted that these problems can be systematically approached.
To begin with, all sources again agreed on the necessity of the bearing installation check to find out the incorrect assembly of the parts. Most vibrations occur due to misalignment and this class of troubleshooting seemed very critical. They also believe it is necessary to evaluate the physical appearance and the integrity of the parts which might be subject to wear and tear.
Next to be pointed out was hurt thus I a lubrication. Most of the websites cautioned about the type and amount of lubricant that was used compared to the recommendations of the manufacturer. Efficient lubrication minimizes friction as well as noise. It was recommended that lubricants should be selected according to their viscosity grade to the conditions of operation.
Temperature control was the next thing that was brought to the attention of the readers and it was observed that increasing temperatures might be because of too much friction or excessive loading. It was suggested that the temperature for working in the system should be sufficient such that no undue stresses exceed the operating limits.
Finally, suggested were conducting vibration analysis using special devices of the type of accelerometers in which parameters of the curve, namely vibrations were followed. Major technological characteristics were the amplitude, frequency, and velocity ranges, as these allow for the diagnosis of specific faults such as imbalance or bearing deterioration.
In closing, these sites presented a very detailed methodology for the detection and eradication of bearing noise and vibration focusing on alignment, lubrication, temperature, and vibration analysis.
When to Consider Professional Service?
Where professional service should be sought for bearing noise and vibration, there are clear indicators that one has to consider. In case of continued loudness and vibration even after implementing all the possible corrective measures, it is advisable to involve an expert. Also, if you have no idea about the values of parameters you measure with an accelerometer − amplitude, frequency, velocity level, etc. − and how they relate to aspects such as imbalance or bearing wear, the help of this kind may be irreplaceable.
According to the first three websites which I went through excessive vibrations may also be attributable to wear and tear or even structural defects which are sufficient grounds for a specialist to be sought. Similarly, in instances where temperature measuring instruments record excessive heat which is abnormal from the normal working state, then it would warrant the need for a professional to investigate why this heat is occurring, possibly system overload or less lubrication. Professional engagement is vital in carrying out proper and accurate diagnoses and delivering focused interventions toward addressing the problems to avoid causing further damage and unnecessary prolonged idle time.
Frequently Asked Questions (FAQs)
Q: What are the common signs that indicate you need to change a bearing in a water pump?
A: Common signs include a noisy pump, leaks around the pump motor, and reduced performance. If you discover a worn-out bearing, it’s essential to replace it to prevent further damage.
Q: How do you remove the impeller from the pump shaft?
A: To remove the impeller, first, you need to use a screwdriver to loosen the set screws or snap ring that holds it in place. Gently pull the impeller off the shaft. Be careful not to damage the impeller or the shaft during this process.
Q: What tools are required to change a bearing in a water pump?
A: The essential tools include a bearing puller, screwdrivers, a set of bearings, and possibly a snap ring plier. These tools help in removing and installing the new bearing efficiently.
Q: How do you rebuild a domestic water pump to prevent frequent breakdowns?
A: Rebuilding a domestic water pump involves replacing worn-out parts such as bearings, mechanical seals, and impellers. Regular maintenance and using high-quality replacement parts can prevent frequent breakdowns and prolong the pump’s life.
Q: Why does the mechanical seal wear over time in a water pump?
A: The mechanical seal can wear over time due to constant contact with the rotating shaft, impurities in the water, and exposure to high temperatures. Regular inspection and timely replacement can help prevent leaks and maintain the pump’s efficiency.
Q: How can I find detailed step-by-step guides for water pump bearing replacement?
A: You can find detailed step-by-step guides on platforms like YouTube. Many DIY enthusiasts and professionals upload original content that can help you understand the process better. Look for videos that feature a clear transcript and detailed instructions.
Q: What are the benefits of replacing a noisy water pump bearing?
A: Replacing a noisy water pump bearing can prevent further damage to the pump motor and other components. It ensures the smooth function of the pump, reduces the risk of a complete pump breakdown, and ultimately prevents heartbreak due to unexpected pump failures.
Q: Can you explain the function of the two bearings in a water pump?
A: The two bearings in a water pump support the rotating shaft and ensure smooth operation. They reduce friction and wear, allowing the pump motor to operate efficiently. Over time, these bearings can wear out and need to be replaced to maintain optimal pump performance.
Q: What is the role of a shaft in a water pump?
A: The shaft in a water pump connects the pump motor to the impeller. It transfers the motor’s rotational energy to the impeller, which then moves the water. The shaft must be in good condition to ensure the pump operates effectively and efficiently.
Q: How do you prevent heartbreak caused by water pump failures?
A: Regular maintenance, timely replacement of worn-out parts like bearings and mechanical seals, and using high-quality components can prevent unexpected water pump failures. Following step-by-step guides and tutorials available on YouTube can also help in ensuring proper maintenance and preventing heartbreak.